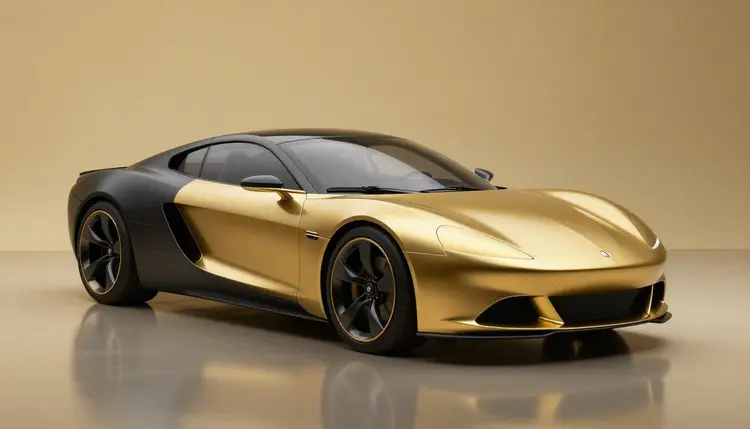
A car wrap is a big commitment made from a tiny swatch. You hold a palm-sized square of film under shop lights, imagine it across a whole hood, and sign. An AI car wrap visualizer closes part of that gap. You upload a photo of your own car, describe the color and finish you are considering, and an image editing model repaints the body in the picture, so you can compare options before anyone quotes you a job.
Swatches lie by omission. A square of film looks one way under fluorescent light, another in a driveway at noon and another under a gray sky, and none of them shows how that color behaves across the long curves of your own bodywork. A mockup on a photo of your actual car answers the first question most people have: do I still like this color once it covers the whole car, in the light where I actually park it?
Image editing models do this well because a recolor is exactly the kind of instruction they follow from plain words: keep the car, the wheels, the glass and the street as they are, and change only the paint. Picasso IA puts 502 models behind one workspace, including nano banana, FLUX Kontext Pro and qwen-image-edit, which all take a photo plus a written instruction, so you can run the same photo through more than one editor and see which one respects your car's shape best. The full catalog lists the rest. New accounts get free credits, which lets you try a first round of colors, and a try takes seconds instead of the deposit and the appointment a real test wrap would need.
Color is only half of a wrap. The finish changes how light travels over the panels, and each one has its own prompt vocabulary. Keep the photo fixed and rotate the finish words, the way you would flip through a swatch book, until one direction clearly wins.
| Finish | Prompt words that steer it | What to check in the preview |
|---|
| Gloss | glossy vinyl wrap, wet-look shine, soft sky reflections | Whether the color still feels rich when highlights slide across the doors |
| Satin | satin finish, soft sheen, low-contrast highlights | How the character lines along the sides stand out |
| Matte | flat matte finish, no reflections, even surface | Whether a large car starts to look heavy or flat |
| Metallic or color shift | metallic flake, pearl, shifts between two tones | How the two tones split over curves, then ask for a real sample |
| Two-tone accents | black roof, gloss black mirrors, gold wheel accents | Whether the accents balance the main color or fight it |
Two habits speed this up. First, keep the same photo and the same camera angle for every run, so the only thing changing between images is the paint. Second, generate a few variants per prompt and read them side by side; a tight spread means your wording is precise, a wild one means the model is guessing and the prompt needs another sentence. The effects page collects one-click preset looks, and skimming it is a quick way to pick up style vocabulary. The same logic works for a hairstyle try-on: one fixed photo, many variations of one thing.
This is the flow from one photo to a shortlist you can show an installer. It assumes nothing more than your car, a phone camera and a free afternoon.
- Photograph your car properly. Park in open shade or under an overcast sky, stand back far enough to fit the whole body, and take a three-quarter view plus a straight side view.
- Open the toolkit and pick an editing model. In the toolkit, choose nano banana, FLUX Kontext Pro or qwen-image-edit and attach your photo.
- Describe the paint and nothing else. Write an instruction such as: recolor only the body panels to a satin dark green vinyl wrap, keep the wheels, windows, lights, trim and background unchanged.
- Run a few variants and compare them side by side. Keep the photo, change one color or finish word per run, and line the results up on one screen.
- Correct one thing at a time. If a mirror or a headlight got recolored by mistake, feed the best result back in with a single fix, then save your top two or three for the wrap shop.
The editor can only work with what the photo shows. A car shot in harsh midday sun, half in shadow, with glare across the hood, gives the model very little honest information about the paint, so it improvises. Three details matter most. The angle: a three-quarter view shows the front and the side together, which is how most people picture the finished car. The light: open shade or an overcast day keeps reflections soft, so the recolor has less to invent. The framing: leave room around the car so nothing important is cut off at the edges.
Then write the prompt as an instruction to change one thing. Name the color the way you would on a swatch card, say vinyl wrap and the finish, and list what must stay untouched: wheels, glass, headlights, trim and background. A manufacturer color name is no guarantee of an exact match, so describe the shade in plain words such as deep forest green, warm bronze or pearl white with a faint blue shift.
Tip: if you have a photo of the real film, from a shop sample or a car already wearing it, attach it as a second image and ask the model to match its color and finish. Editors that take several images, nano banana among them, follow a reference far better than a color name. Your screen still cannot show the true shade of the film, so treat the match as a direction, not a verdict.
The preview earns its keep in the conversation with the installer. Something darker, but not black turns into a picture they can react to, and you find out quickly whether your idea is a full wrap, a partial wrap or just a roof and mirrors. Show the front, the side and one close-up, and ask which panels and recesses the quote covers, since edges and door jambs are where a wrap gets difficult.
Ask for a physical sample and hold it against the car outdoors, at the time of day you drive. If you want a sharp image for a printout or a message, an upscaler can add resolution to the best preview. Use photos of your own car, or one you have the owner's permission to edit, and keep license plates out of anything you share.
A preview is a decision aid, not a render of the finished job. There are five places where it stops being reliable:
- Reflections: the model paints reflections it imagines, while a real gloss or chrome film mirrors your street, the sky and your neighbors in ways no preview can know.
- Panel gaps and edges: seams, door shuts, bumper corners and badge cutouts are where an installer must tuck and trim, and the preview paints over them as one smooth surface.
- True color: your screen, the photo's white balance and the model's guess all stand between the picture and the film, so only a sample seen outdoors is an honest check.
- Special finishes: color-shift, chrome and textured films come out as an impression of the look, not of how the material changes as you walk around the car.
- Details that must not change: lights, wheels, trim and mirrors are sometimes recolored or softened, so zoom in on every result before you trust it.
None of this is a reason to skip the step. A wrap shop gives the real answer: it can hold the film against your car, say which curves are hard to cover and quote the work. The preview just gets you there with a clearer idea.
Can AI show me my car in a different color?
Yes. Upload a photo of the car to an image editing model such as nano banana, FLUX Kontext Pro or qwen-image-edit and describe the new color and finish. The model repaints the body and tries to leave wheels, glass and the background alone. It works best with a clear, evenly lit photo, and you should always zoom in to check that nothing besides the paint was changed.
Is there a free AI car wrap visualizer?
Picasso IA gives new accounts free credits, enough to try a handful of colors on one photo and see whether a direction holds up. Each generation costs credits, and the amount depends on the model and the settings you pick. Plans are listed on the pricing page, which is the only place worth trusting for numbers because they change.
Which AI model is best for recoloring a car?
There is no single best, which is the argument for a catalog. nano banana handles edits from a plain sentence and accepts extra reference images, FLUX Kontext Pro is built around changing one thing in an existing image, and qwen-image-edit follows color and object instructions closely. Run the same photo and prompt through two of them and keep whichever one left your car's shape and wheels alone.
How accurate is the preview compared to a real wrap?
It is accurate about the idea, not about the film. The preview tells you whether a color and finish suit the shape of your car. It cannot tell you how the real vinyl reflects light, how it looks at the seams, or what the exact shade is on your screen versus outdoors. Treat it as the step before a real sample, never as a replacement for one.
Can I preview a specific film or color name?
You can describe it, and if you have a photo of the real film you can attach it as a second image and ask the model to match it. Names from a manufacturer chart are not guaranteed to be understood, so words like deep forest green or satin bronze work better. Whatever comes out is an approximation, so confirm the real shade with a physical sample.
Does it work with a photo from my phone?
Yes, any clear phone photo will do. Shoot in open shade or overcast light, fit the whole car in the frame and avoid heavy glare on the hood and roof. A three-quarter angle usually gives the most convincing result. If the first output looks soft, you can run it through an upscaler afterward, but a sharp original always gives the model more to work with.
Can I preview only a partial wrap, like a black roof or a hood?
Yes, and it is often the most useful test. Ask the editor to recolor only the roof, only the hood or only the mirrors and say that the rest of the body stays unchanged. Partial looks are also easier to compare, because the original paint stays visible next to the change. Check the edges of the recolored area carefully, since that is where models blur or overshoot.
Can I use the preview to get quotes from wrap shops?
It helps as a visual brief. Show the shop two or three previews along with the front, side and rear photos of your car, and ask what the finish would involve on those panels. The shop still decides what is feasible and what it costs, and it will want to see the actual car. The preview saves explanation, not inspection.
Can I use a preview in a car listing?
No. A listing photo must show the car as it actually is, and a recolored image would mislead the buyer even if you mean it as a what-if. Keep the previews for your own planning and for the conversation with an installer, and use real photos of the real car whenever you sell.
Do I need to tell my insurer or registration office about a wrap?
Rules differ by country and region, and sometimes by insurer, so this is general information and not advice. In some places a major color change has to be reported, in others it does not. Check with your insurer and your local vehicle registration authority, and ask the wrap shop what is usual in your area before you book.
Your car is already in your phone gallery. Open the Picasso IA toolkit and see it in the next color before you decide.