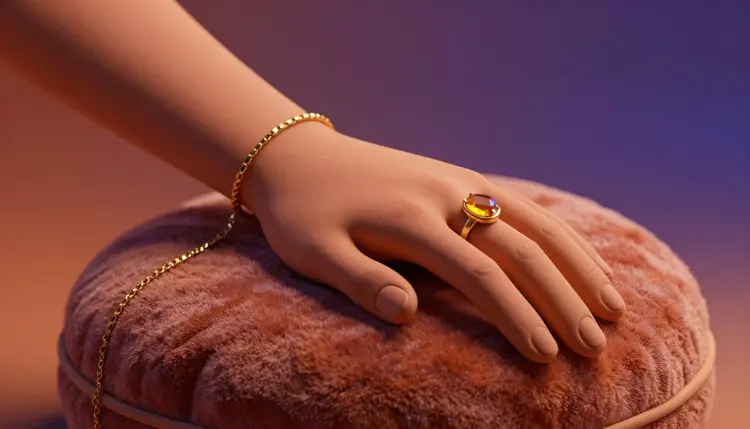
A jewelry shoot needs a model, a photographer, a retoucher and a morning spent getting the hands to look relaxed. If your catalog runs to dozens of rings and necklaces, that adds up to a lot of mornings. AI image editing lets you start from one clean photo of the piece, show it worn on a hand, a neck or an ear, and review the options on screen, with no model booked and no studio day to schedule.
A ring on a white background tells the shopper what it is. A ring on a finger tells them how big it looks, how it catches light against skin, and whether it suits a hand like theirs. Worn shots answer questions that a flat packshot cannot, which is why most jewelry stores want both.
The cost sits in the people. Hiring a hand model for a morning to wear a long run of rings is a real expense for a small brand, and a reshoot after a design tweak means paying for it again. With image editing models on Picasso IA, the piece photo is the only thing you need to own. You supply it as a reference, describe where it should sit, and the model draws a hand, neck or ear around it. The catalog of 502 models includes several editors that accept reference images, so you can try the same piece on more than one engine and keep whichever draws the metal more faithfully.
Each kind of jewelry has its own way of going wrong, so it helps to know what to check before you generate. This table lists the common placements and the detail that usually breaks first.
| Piece | Typical placement | What to check in the result |
|---|
| Ring | Hand resting flat or a single finger raised | Band thickness, number of fingers, stone sitting level |
| Pendant necklace | Collarbone, neck and upper chest | Chain length, pendant size against the neckline |
| Stud earrings | Close crop of the ear, hair tucked back | Both ears matching, post and stone scale |
| Drop earrings | Ear with a slight head turn | Drop length, how the piece hangs, shadow on the neck |
| Bracelet | Wrist on a table or a hand mid-gesture | Clasp detail, link pattern repeating cleanly |
Pick one placement per piece to start with. A tight crop of one hand wearing one ring is far easier for a model to draw correctly than a full portrait with a necklace, two earrings and a bracelet all in view. Build up to the busier frames only after the simple one comes out right.
This is the workflow for turning one product photo into a worn shot you can judge. It assumes a clear photo of the piece and a few minutes per image.
- Photograph the piece cleanly. Shoot it on a plain surface in even light, sharp from the front, with the stone and the clasp visible. Every later step depends on this reference.
- Open an editing model in the toolkit. Pick google/nano-banana-pro or picassoia/picassoia-image-editor-pro in the toolkit and attach the piece photo. Add a photo of a hand or neck if you want to control the pose.
- Describe the placement in one plain sentence. For example: place the ring from image 1 on the ring finger of a relaxed hand resting on a linen cloth, soft window light, the stone facing the camera.
- Generate several variants and zoom in. Read each result at full size, comparing the band, the prongs and the stone against your original photo before anything else.
- Fix one thing at a time. Send the best result back through the editor with a single correction, such as a thinner band or a smaller stone, and stop once it matches the real piece.
Models invent when a prompt leaves room to invent. Name the metal (yellow gold, white gold, oxidized silver), the stone and its cut, and the finish, polished or brushed. Say where the light comes from, because the way a stone sparkles depends on it, and a vague prompt gets a vague sparkle that looks nothing like your cut.
Keep the scene simple. A plain linen cloth, a neutral sweater or bare skin under soft daylight leaves the jewelry as the only complicated object in the frame. Ask for the skin tones you want to show, and generate the same piece on a few of them, since shoppers want to see how it looks on a hand like theirs.
Always compare the result with the real piece at full size before it goes anywhere near a product page. A model can add a prong, merge two links or soften an engraving without any sign that it did so, and the picture will still look polished.
On resolution, nano-banana-pro offers 1K, 2K and 4K output, and a high setting helps when you plan to crop in close on a clasp or a setting. If a result is nearly right but soft, an upscaler such as nightmareai/real-esrgan can sharpen it, as the photo upscaler page explains.
Jewelry is one of the hardest things to fake convincingly, because buyers study it closely. Here is where the approach runs out of road:
- Fine metalwork: filigree, milgrain, engraving and tiny hallmarks are the first things a model simplifies or redraws, so a close crop on them is the likeliest place to find an error.
- Gemstone facets: the facet pattern of a diamond or the exact color zoning of a sapphire is drawn from the model's idea of a gem, not from your stone, so the sparkle can look right and still be wrong.
- Scale accuracy: nothing in the editor knows that your pendant has a specific width in millimeters, so check size against the hand or neckline yourself and never let the picture suggest a bigger piece.
- Clasps and chains: link patterns can repeat badly, clasps can vanish, and a chain can change length between variants, which matters if the product page lists a size.
- Dedicated try-on models: prunaai/p-image-try-on is built to dress a person in garments, so it is the wrong tool for a ring or an earring, and the general editors are the better fit here.
For a hero shot of a high-value piece, a real photograph is still the safer choice. AI worn shots work best as a way to show many pieces in context, with a human check on every image.
A product picture has one job, which is to show the item the customer will receive. If the generated image alters the stone, the proportions or the finish, it misleads shoppers, and a return costs more than the shoot you saved. Treat every output as a draft that must match the real piece, and delete the ones that flatter it.
The hands, necks and ears in these images belong to nobody. They are synthetic, and that is the point, but it also means the picture must never imply that a real person wears the piece or recommends it. Do not add a caption, a quote or a name that suggests an endorsement. If you start from a photo of a real person, use only someone who agreed to it, such as yourself or a model you hired. Marketplaces and ad platforms also have their own rules about edited and AI-made product images, so check each platform's current requirements before you upload. For wider context, see AI product photography and AI fashion model photos.
Can AI show my ring on a hand without a model shoot?
Yes. Upload a clean photo of the ring to an image editing model, describe the placement, and it draws a hand wearing it. You may need several attempts, because rings are small and the model can change the band or the stone. Check each result against the real ring before using it, and keep only the versions that match.
Which Picasso IA models work for jewelry on a model?
Image editors that accept reference images are the right fit. google/nano-banana-pro takes up to 14 reference images and offers 1K, 2K and 4K output, and picassoia/picassoia-image-editor-pro accepts up to three images that you refer to as image 1, image 2 and so on. You can run the same piece on both in the toolkit and compare which one draws the metal better.
Does prunaai/p-image-try-on work for rings and earrings?
It is built for clothing. The model puts garments on a person photo while keeping the face, pose and body shape, and its listing describes tops, bottoms and accessories in that sense. It is not designed around small jewelry, so for rings, necklaces and earrings the general image editors are the more sensible starting point.
Will the gemstones and engraving look exactly like my piece?
Not reliably. The model draws gems and fine metalwork from its general idea of how they look, so facets, color and tiny engraving can drift from your actual piece. Close crops are where this shows. Treat the generated image as a context shot and keep a true photograph of the piece itself as the reference for detail.
How do I keep the jewelry the right size on the model?
Check it yourself, because the editor has no idea of real dimensions. Compare the piece against the finger, ear or neckline in the picture and ask whether it matches what a customer would see. If it looks too large or too small, say so in the prompt and regenerate. Never use a picture that makes a piece look bigger than it is.
Are the models in these photos real people?
No. The hands, necks and ears are synthetic, drawn by the model. That means no one is paid, and no one is vouching for your product, so do not write anything that suggests an endorsement. If you upload a photo of a real person as the base, use only yourself or someone who gave permission, never a stranger.
Can I put necklaces and earrings on the same picture?
You can, but start with one piece per image. Several small objects in one frame raise the chance that a chain merges into the neckline or one earring differs from the other. Once a single-piece shot works, add the second piece and read the result closely, element by element.
Can I use these images on my store or marketplace listings?
Many sellers do, but the rules belong to each platform. Marketplaces and ad networks set their own requirements for edited and AI-generated product images, and they change, so read the current ones before you upload. Whatever the platform says, the picture has to show the item truthfully, with the same stone, metal and proportions the buyer will receive.
How do I make the result sharp enough for a product page?
Start with a sharp reference photo, choose a high resolution when the model offers one, and zoom in on every result. If a good image is slightly soft, an upscaling model such as nightmareai/real-esrgan can add clarity. An upscaler cannot repair a wrong prong or a missing link, so reject those images outright.
How much does it cost to generate jewelry photos on a model?
Generations use credits, and the cost depends on the model and the settings you choose, so any figure written here would go out of date. New accounts get free credits to try the workflow. For current plan details, see the pricing page, which is the only place to trust for numbers.
Your next catalog update does not have to wait for a booked shoot. Open the Picasso IA toolkit, attach one photo of the piece, and see it worn on screen today.