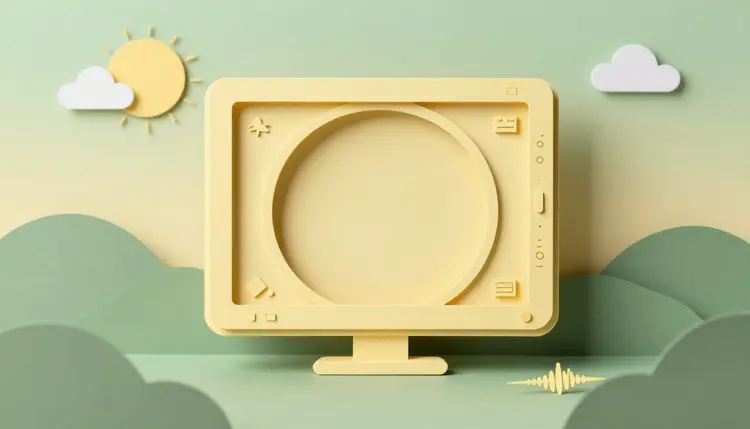
A stream looks finished when its pieces match: a webcam frame that fits your camera box, panels under the video, a starting soon screen that does not look borrowed from somebody else. Most small channels stitch these together from templates that half fit. With image models you can describe the whole pack once, generate a matching set, and keep tuning until it reads as one channel instead of five downloads.
Overlays are small graphics with a big job: they tell a viewer which channel they landed on before you say a word. The usual routes are a template pack that only half fits your layout, a commissioned set that takes a while to come back, or a weekend inside a design app. Image models add a fourth route. You describe the look in plain words, get a family of matching pieces, and rerun the prompt whenever the season, the game or your mood changes.
Picasso IA runs 502 models behind one workspace, 212 of them text-to-image, so the same brief can go through engines with different strengths. Some are better at flat graphic shapes, some at lettering, some at painted texture, and the only way to learn which is which is to try them side by side. New accounts get free credits, enough to test a direction before you commit to it. Everything runs in the toolkit, and the full catalog is open if you want to browse first.
Each piece of a pack has its own job and its own way of going wrong. This table is how to think about them before you write a single prompt.
| Piece | What it has to do | Best first approach | Where it goes wrong |
|---|
| Webcam frame | Surround your camera feed without covering your face | A vector model such as recraft-v4.1-svg, then delete the center shape | The opening is not the shape of your camera box |
| Info panels | Sit under or beside the video and read at a glance | An image model with flat shapes and empty label space | Long words generated inside the picture |
| Starting soon screen | Hold the screen for a few minutes without feeling empty | A wide image model, with a calm area for text | Busy art that fights the words on top |
| Offline banner | Say the channel exists and leave room for a schedule | The same style as the pack, with plain space left open | Dates and times baked into the art |
| Alert background | Frame a short moment like a follow or a raid | A still graphic first, animation only if you need it | Motion that outlasts the event |
The pattern is the same in every row. The model supplies mood, material and shape; you supply the words and the exact opening. Treating the generated picture as a background or a frame, and not as a finished layout, is what keeps the result usable.
This order keeps a pack matching, because the style gets decided once and reused. It assumes you already know your layout: where the camera box, the chat and the panels sit on your canvas.
- Fix the style in one sentence. Pick a material, a palette and a mood, for example cut paper in sage green and butter yellow, and paste that sentence at the start of every later prompt.
- Draw the webcam frame as a vector. Open the toolkit, choose recraft-v4.1-svg, ask for a rectangular frame with a flat empty center, and set an aspect ratio close to your camera box.
- Create the starting soon background. Run a wide prompt in an image model such as ideogram-v4-quality, and ask for a calm, empty area in the middle where your own text will sit.
- Match the panels to the frame. Give nano-banana-2 the frame as a reference image and ask for panel backgrounds in the same material and palette, with no words in them.
- Clean up and test on a live scene. Remove leftover backgrounds with remove-background, sharpen soft edges with recraft-crisp-upscale, then load everything into your streaming software and check it next to real video.
How to Prompt for Clean Frames and Correct Text
The most useful sentence in a frame prompt is about the hole, not the border. Say what the center is: a flat solid color, one plain shape, nothing inside. Models love to fill empty space with decoration, so name the emptiness the way you would name a subject. Then describe the border in material words, such as stitched felt, brushed metal, torn paper or soft neon tube, and keep the palette to two or three named colors so the frame does not fight your camera feed.
Text is the second trap. Image models have improved at lettering, and some handle a short word well, but a channel name that is spelled one letter wrong is the kind of mistake viewers screenshot. The reliable habit is to generate the art with no words at all, then type the real text in your streaming software, where the font, the spelling and the position stay under your control. If you do ask a model to draw a word, keep it short and proofread every character before it goes live.
Tip: generate three or four versions of the same frame, then put each one over a recording of yourself, not over an empty canvas. A frame that looks balanced alone can crowd your shoulders, hide a hand gesture or turn muddy against your room lighting.
For motion, start from the still. If the starting soon screen should breathe a little, turn the finished image into a short loop with an image-to-video model, and keep the movement slow enough that the text on top stays readable. The logo animations and intros page covers that kind of short motion in more detail.
The first mistake is designing every piece separately. Five great images in five styles make a bad pack, which is why step one is a style sentence you reuse, and why a reference image beats a longer prompt when you want two pieces to match. The second is skipping the layout. Before you generate anything, note where your camera, chat and game capture sit, because a frame drawn for a wide camera box will not suit a square one.
The third mistake is baking information into the picture. Your schedule, your social handles and your current game change faster than a generated image does, so leave those as editable text. The fourth is forgetting that a webcam frame has to hold a moving person: leave breathing room around the opening and keep heavy detail at the edges, away from your face. The last is trusting a first export. Platforms and streaming tools have their own current requirements for sizes, file types and safe areas, so check the current rules of the one you use instead of relying on a number from a blog post.
An honest page says where the tool stops. For overlays there are five places:
- Transparent centers: image models return flat pictures, so a webcam frame needs its middle removed by you, by deleting the center shape in a vector file or by erasing it in an image editor, because background removal is built to cut out a subject and may not punch a clean hole.
- Exact fit: a model will not know your camera box or your layout, so the opening usually needs a trim or a resize before it lines up with your real source.
- Lettering: even good models can misspell a name or garble a longer phrase, so words belong in your streaming software, not in the art.
- Brand continuity: a generated pack is consistent within one session, but matching an existing logo or a hand-drawn mascot takes reference images and a few rounds of correction.
- Animation: loops from a still can drift or wobble, so alerts and stingers with precise timing are still better built in motion software.
A pack made this way is a strong starting point and a fast way to try looks. It does not replace a designer when you need a strict brand system, and any logo or character in it should be your own or a fictional one, never a real person or someone else's artwork.
Can AI make a webcam frame with a transparent center?
Not directly from a normal image model, because most return a flat picture with a solid background. The cleaner route is a vector model such as recraft-v4.1-svg: it outputs editable paths, so you can open the file and delete the shape in the middle. With a raster frame you can ask for a flat solid center color and erase it in an image editor or key it out in your streaming software.
Which AI model is best for stream overlays?
There is no single best, and that is the argument for a catalog. A vector model suits frames and icons, an image model with strong lettering suits starting soon screens, and an editing model such as nano-banana-2 helps keep several pieces in one style by working from a reference. Run the same brief through two or three of the 212 text-to-image models and keep the one that understood your layout.
How do I make all the pieces of my pack match?
Write one style sentence covering material, palette and mood, and start every prompt with it. Then use an editing model with your first approved piece as a reference image, so the second and third pieces inherit the look instead of reinventing it. When something drifts, correct one thing at a time: the border width, the color, the amount of texture. Changing three things at once makes it hard to see what helped.
Can AI spell my channel name correctly on a starting soon screen?
Sometimes, and short names have a better chance than long phrases, but you should never rely on it. A single wrong letter on a screen that sits there for minutes is very visible. The safer workflow is to generate the background with no words, leave a calm area, and type the name with a font you picked in your streaming software, where you can proofread it and change it later.
What size should my overlays be?
That depends on your platform, your canvas and your layout, and requirements change, so check the current guidance from the platform you stream on instead of trusting a fixed number here. As a rule of thumb, pick the aspect ratio that matches the space the piece will fill. Vector output is forgiving because it scales without blur, while raster images are better generated large and then reduced.
Can I animate a starting soon screen?
Yes. Take a finished still, run it through an image-to-video model in the toolkit, and ask for slow, subtle movement such as drifting clouds, floating particles or a gentle glow. Keep the loop short and calm, because the text on top has to stay readable. Check how the loop behaves where it repeats, since a visible jump at the seam looks worse than a still image.
Can I use my own logo or mascot in the overlays?
Yes, if it is yours. Upload it as a reference to an editing model and ask for the frame or panel to be built around it in the pack style. Check the result closely, because models can redraw small details of a logo. Stick to your own artwork or a fictional character, never a real person's likeness or another creator's mascot, and keep the original file for the final placement.
How do I get rid of a leftover background?
Run the image through a background removal model such as remove-background, which returns a transparent PNG with the subject kept. It works best on a clear subject like a mascot, an icon or a badge. For a frame with a hole in the middle, results vary, so the more dependable fix is the vector route or a manual erase of the center in an image editor.
Do I have to pay to try this?
New accounts receive free credits, so you can generate a first frame and a first screen before paying anything. After that, generation costs credits, and the amount depends on the model and the settings you choose, so no single number would be right for every piece. Current plans are on the pricing page, which is the only place to trust for figures.
Can I sell or share the overlay packs I generate?
Rules differ by country and by platform, and the law on machine-made images is still settling, so treat this as general information and check the current terms yourself. If you plan to sell a pack, rework the pieces substantially, keep logos and characters to your own or fictional ones, and read what your marketplace expects first. For your own channel, the main concern is simply that nothing in it copies somebody else.
Ready to build a pack that looks like one channel? Open the Picasso IA toolkit and generate the first frame in the next few minutes.