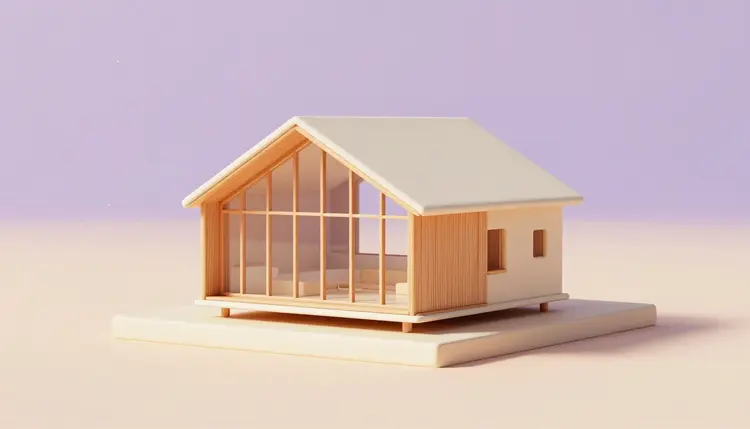
An architecture sketch already carries the idea: massing, proportion, the relationship between a window and a wall. What it lacks is the answer every client actually asks, which is what this will look like once it exists. AI rendering closes that gap without a 3D model or a render farm. Feed the sketch to an edge-guided model and the lines you drew become the structure of a photorealistic image, with the materials, light and mood set by a sentence.
A floor plan or an elevation reads clearly to another architect and vaguely to almost everyone else. Clients and planning boards respond to something that looks like a place, not a diagram of one, and building that image by hand in a 3D suite costs hours you may not have for an early concept that could still change. An AI render turns the sketch into that image directly, and because it follows your lines rather than inventing its own composition, the proportions a client signs off on are the ones you actually drew.
Picasso IA runs 488 models behind one interface, including two families built for this: FLUX Canny, from Black Forest Labs, which reads the edges of a reference and locks them as structure, and ControlNet Scribble, which works from looser hand-drawn lines. Both accept a sketch or a screenshot plus a text prompt describing everything the lines cannot show. The full catalog is browsable if you want to see the rest, and new accounts get free credits, enough to test whether a concept holds before you commit time to it.
The two approaches solve the same problem with different tolerances. FLUX Canny Pro and FLUX Canny Dev detect edges automatically from a clean reference and hold them tightly, which suits a scanned line drawing, a printed floor plan or a screenshot exported from SketchUp or Revit, where the geometry is already precise and you want the render to respect it. ControlNet Scribble reads a looser scribble as a general shape rather than an exact outline, which suits a quick massing study where you want the model to fill in detail the sketch never specified.
| Input You Have | Model to Use | What It Preserves |
|---|
| Hand-drawn elevation, scanned or photographed | FLUX Canny Pro | Exact wall lines, window openings, proportions |
| Loose massing scribble or thumbnail sketch | ControlNet Scribble | General shape and composition, loosely |
| Screenshot from SketchUp, Revit or Rhino | FLUX Canny Dev | Camera angle, structural geometry |
| Existing floor plan drawing | FLUX Canny Dev | Wall layout and room boundaries |
| Only a written description, no image | A text-to-image model, no edge control | Nothing structural, a guess at the layout |
Both Canny models expose a guidance or control setting that trades strict line adherence for creative freedom, so a first pass at a high setting confirms the model read your sketch correctly before you loosen it for variety. The effects page collects preset looks if you want a faster route into material and lighting vocabulary than guessing adjectives from scratch.
This is the path from a drawn idea to a presentation-ready image, and it assumes nothing more than a sketch and about fifteen minutes.
- Prepare a clean reference. Scan or photograph the sketch flat, under even light, and crop out the margins; a high-contrast image with clear lines gives the edge detector far less to guess about than a faint pencil photo.
- Pick edge-guided or sketch-guided. Use FLUX Canny for a precise drawing, plan or 3D screenshot you want followed exactly, and ControlNet Scribble for a loose massing sketch you want interpreted more freely.
- Write the material and light prompt. Name the actual materials, the time of day and the mood: brushed concrete, white oak louvers, floor to ceiling glass, late afternoon light, overcast sky, whatever the design calls for.
- Generate several variations. Run the same sketch against two or three prompts, or the same prompt at two guidance settings, and compare how closely each one held the geometry before picking a direction.
- Upscale the winner for presentation. Run the chosen render through an upscaling model so it holds up printed or projected large, and keep the original sketch alongside it in the deck as the proof of where the image came from.
The prompt is doing more work than the sketch in most sessions, because the lines only fix the geometry; everything a viewer reacts to emotionally, the warmth of the light, the texture of the facade, the season, comes from the words. Describe materials the way a specification sheet would rather than a mood board: name the actual finish, not just a color, since brushed concrete and painted concrete render very differently even along an identical outline. State a time of day and a sky condition explicitly, because an unstated one defaults to flat midday light that flatters nothing. And keep the guidance setting moderate on a first pass, since pushing it to the maximum can bake scan artifacts or stray pencil marks into the output as if they were structure.
Pro tip: a clean reference image matters more than a clever prompt. Scan the sketch rather than photographing it at an angle, boost contrast so the lines are unambiguous, and remove smudges or shadow before you upload it, because an edge detector renders exactly what it is given, mistakes included.
For a small studio, the value sits earliest in the process, where a concept is still one hand-drawn option among several and a full 3D model would be premature. Turning three competing massing sketches into three renders in an afternoon lets a client react to something that looks real before anyone commits modeling hours to the chosen direction, and interior schemes benefit the same way once floor plans firm up, using the workflow covered in AI interior design.
Architecture students get a faster review cycle: a studio crit moves quicker when a section sketch shows up as a plausible photoreal view instead of a diagram the panel has to imagine into being. Contractors and permit reviewers benefit from the same clarity in the other direction, since a render that follows the architect's actual lines is a better shared reference than a sketch one side reads more literally than the other. Weighing a catalog against a single subscription for this kind of work is what the Picasso IA vs Midjourney comparison covers.
An honest tool page says where a tool stops working. For sketch-to-render, five real limits stand out.
- Small structural details drift: window mullions, railing spacing and stair counts can shift slightly even under tight guidance, so anything load-bearing or code-relevant still needs verification against the actual drawing set, not the render.
- Interior structure behind a facade is invented: an exterior elevation only constrains the exterior; the model has no floor plan to work from, so it improvises interior walls and ceiling heights that should never be treated as design intent.
- Materials read approximately, not exactly: a named material renders as a plausible interpretation of it, not a color-matched swatch, so specification-critical decisions still belong in a materials board, not the render.
- Scale cues can mislead: without a human, a car or a known object in frame for reference, a render can make a building read larger or smaller than it is, which matters when the image is being used to judge proportion.
- Dense line drawings lose fidelity: a heavily annotated construction drawing, full of dimension lines and text, confuses edge detection; renders read best from a clean concept sketch, not a working drawing.
None of these is a reason to skip the render. They are the reasons the drawing set, not the picture, stays the document of record.
What is the best AI model for turning an architecture sketch into a render?
FLUX Canny Pro is the strongest choice when you have a clean, precise sketch or a 3D-software screenshot and want the render to follow it exactly, since it reads edges automatically and holds them tightly under a text prompt. FLUX Canny Dev does the same job at a lower cost with slightly more setup. ControlNet Scribble suits a looser hand sketch you want interpreted rather than traced. Testing a sketch through more than one is cheap and often the fastest way to see which reading you prefer.
Can I use a photo of a physical model instead of a drawn sketch?
Yes. Both Canny models read edges from any reference image, so a photograph of a cardboard or 3D-printed study model works the same way a scanned sketch does, as long as the lighting is even enough that the model's edges read clearly against its background. A plain backdrop and a straight-on angle produce a cleaner edge map than a busy desk in frame.
Do I need a finished floor plan before I can generate a render?
No, an early concept sketch is enough, and for a first pass a sketch is often better than a finished plan because the model has room to interpret the details you have not decided yet. A finished floor plan or elevation becomes useful once you want a render that respects specific dimensions, room shapes or window placement exactly, at which point the edge-guided models hold those lines more literally.
How closely does the render actually follow my lines?
Closely, and you control how closely with the guidance or control setting on the model. A high setting holds your geometry almost exactly and asks the prompt to fill in only surface qualities like material and light; a lower setting lets the model take more liberty with the composition in exchange for a result that may look more finished. Running the same sketch at two settings and comparing is the fastest way to find where a given project wants to sit.
Can I show different materials on the exact same building shape?
Yes, and this is one of the strongest uses of edge-guided rendering. Because the same control image locks the same structure, you can run it against several prompts, brick against timber cladding against a glass curtain wall, and get back the identical massing rendered in each material, which is a fast way to compare options in a client meeting without redrawing anything.
Will the render match my drawing set exactly enough to submit for permit?
No, and it should not be treated as one. A render is a communication tool for showing intent to a client or a review panel; it can shift small structural details even under tight settings and has no awareness of code, dimensions or engineering. The drawing set stays the document of record, and the render illustrates it.
Can I generate an interior view from a floor plan the same way?
Yes, and it is one of the most useful applications, since an interior sketch usually specifies less than an exterior elevation does, leaving more for the prompt to fill in around furniture, finishes and light. The same edge-guided and sketch-guided workflow applies, and the fuller walkthrough for that side of the process lives on the AI interior design page.
How do I get a render clean enough to print large for a presentation?
Generate at the highest resolution the model supports, then run the chosen image through an upscaling model before printing, since even a strong render can show softness at poster size straight out of generation. Keep the original sketch in the deck next to the render so a reviewer can see exactly how closely the two match, which also makes the render easier to trust.
Does this replace 3D modeling and rendering software?
Not for construction documentation, and it is not trying to. What it replaces is the hours spent building a throwaway 3D model just to show a client what an early concept might look like. Once a direction is chosen and needs precise dimensions or construction detail, a full 3D workflow still does that job better; sketch-to-render is the fast pass before that investment is justified.
How much does generating an architecture render cost?
Generations are paid in credits, and the exact cost depends on the model and resolution you choose, so quoting a specific number here would be wrong within a few months. New accounts start with free credits, which is enough to test a sketch across a couple of models and settings before spending anything, and current plans are listed on the pricing page, the only place worth trusting for numbers.
Your sketch already has the idea. Open the Picasso IA toolkit and upload it to see the render it was describing.