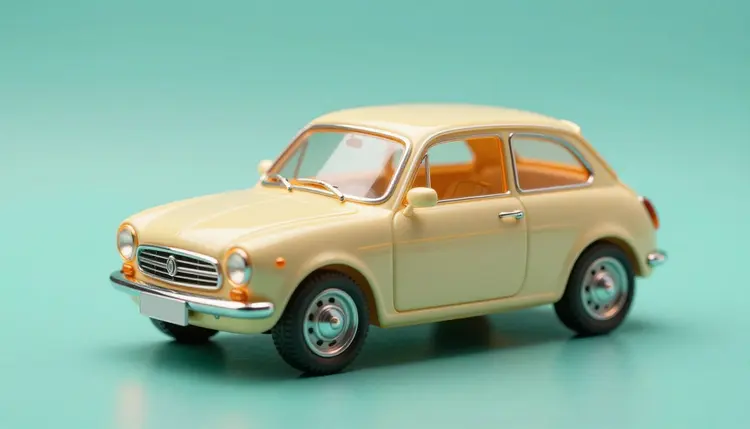
A used car lot is a messy place to take a photograph. There is the car next door, a light pole growing out of the roof, a gray sky, and yesterday's puddle. Buyers scroll past listings like that in a second. AI can lift the car out of that scene, set it on a clean backdrop and balance the light, so an entire inventory reads as one tidy lot. The car is never the thing that changes.
A listing photo has one job: show the vehicle. Everything else in the frame competes with it. A clean backdrop removes the competition, and a consistent one across fifty cars makes the lot look organized before the buyer has read a single line of the description.
The old fix was a photo booth, a cyclorama wall or a day of detailing and positioning in perfect light. Small dealers and private sellers rarely have that. What they have is a phone and a gravel lot. Background models change the economics: you shoot the car where it sits, then swap the place afterwards.
Picasso IA runs 502 models, and a handful of them cover this exact job, from background removal to scene generation to prompt-based photo editing. They all live in the toolkit, so one session can take a photo from cutout to finished listing image. New accounts get free credits, which is enough to try a few cars before deciding whether it fits your workflow.
There is more than one route, and the right one depends on how much of the original photo you want to keep. Cutting the car out and placing it yourself gives the most control. Generating a background is the fastest. Editing with a prompt is the most flexible when the problem is light rather than place.
| Approach | Model to try | What it does | Watch for |
|---|
| Cut out the car | bria/remove-background | Returns a transparent PNG of the foreground subject | Thin antennas, tinted glass and wheel gaps at the edges |
| Generate a new backdrop | bria/generate-background | Keeps the detected subject and builds a new scene from a text description or reference image | Floor shadows and reflections that do not match the car |
| Edit with a prompt | picassoia/picassoia-image-editor-pro | Takes up to three reference images and a plain-language instruction | It can change more than you asked, so compare with the original |
| Same backdrop for a batch | bria/generate-background with a locked seed | Reproduces a look across several photos | Different car angles still need different floor perspective |
| Fix the sky and light only | picassoia/picassoia-image-editor-pro | Rebalances a dull or harsh scene while the car stays in place | Paint color can drift if the prompt is vague |
A practical rule: if the old background is the problem, cut out or generate. If the lighting is the problem and the place is fine, edit. Many lots end up using both, cutout first, then an edit pass for the floor and reflections. The background removal page covers the cutout step in more detail.
This is the loop that works for one car and scales to a lot. It assumes you already have the photos, taken with a phone is fine.
- Shoot the car straight and whole. Walk around it at a consistent distance, keep the full vehicle in frame, and avoid shooting through a windshield or into direct sun. Models cut cleanly when the car has clear edges.
- Open the toolkit and pick a model. Choose bria/remove-background for a transparent cutout, or bria/generate-background to build the backdrop in one pass. Upload the photo.
- Describe the backdrop plainly. Something like a plain light gray showroom floor and wall, soft even light, no other vehicles, is enough. Lock the seed once you like the look so the next car matches.
- Fix the light with the image editor. Open picassoia/picassoia-image-editor-pro, load the result and ask for one change at a time: softer reflections, a believable floor shadow under the tires, a brighter and more even exposure.
- Compare against the original, then publish. Put the edited image next to the raw photo and check every panel, wheel and window. Only export it if the car you see is the car the buyer will get.
Light is where most lot photos go wrong. Midday sun burns white paint, overcast skies flatten metallic colors, and a dark corner turns a black car into a silhouette. A prompt-based editor can lift the exposure and soften harsh reflections, as long as you tell it what must not move.
Name the constraints in the prompt. Instead of make it look better, write: keep the car, wheels, badges, dents and paint exactly as in image 1, only soften the reflections and brighten the exposure evenly. A model that is told what to preserve tends to preserve it, though not every time, which is why step five exists.
Pro tip: edit the background and the lighting in separate passes. When one prompt asks for a new backdrop, new light and a color boost together, the model has far more room to quietly reshape the car along the way.
For a shared look across the lot, keep the camera height and angle the same on every car. A background that fits a three-quarter front view will look wrong behind a side profile, and no prompt fully fixes that.
This is the part that matters most, so it gets its own section. A clean background changes where the car is, not what it is. Never use these tools to hide damage, remove a dent, smooth a scratch, cover rust, fix faded paint or alter the vehicle's condition in any way. Listings must be truthful, and a photo that shows a better car than the real one is a misrepresentation, not a retouch.
Buyers rely on the pictures to decide whether a visit is worth it, and sellers can be held responsible for what a listing implies. Rules on advertising vehicles vary by country, state and marketplace, so check the current requirements of your platform and local law, and ask a qualified professional if you are unsure what is allowed.
The safest habit is to treat the original photo as the record. If an edit changes anything on the car, even by accident, reject it and run it again. Show the flaws honestly with close-ups, and let the clean background do its actual job, which is making the real car easy to look at.
Clean backdrops help with most inventory, but they are not magic, and a few situations will make you stop and shoot again:
- Reflections: glossy paint mirrors the old surroundings, so a lot behind the car can still show up in the doors and hood after the background is swapped, and it looks wrong against a clean wall.
- Contact shadows: if the floor shadow under the tires is missing or points the wrong way, the car looks like a cutout pasted onto a poster, which buyers notice quickly.
- Fine edges: antennas, roof racks, tinted windows and open gaps between wheel and body are where cutouts leave halos or clip details that are really there.
- Interiors and engine bays: these are about real condition, so the tools are best kept for exteriors and the interior shown as shot.
- Plates and identifying details: decide what you will show before you edit, and check the platform rules, because the model will not make that choice for you.
If the original photo is blurry, cropped at the bumper or taken at a steep angle, no background fixes that. Reshoot first, then edit.
Can AI put a used car on a clean showroom background?
Yes. A background removal model cuts the car out as a transparent image, and a background generation model can place that cutout on a plain studio-style floor and wall described in text. Picasso IA offers both in the toolkit. The result depends on the original photo: a clear, well-framed shot of the whole car gives much cleaner edges than a partial or heavily angled one.
Which models work best for car listing photos?
For cutouts, bria/remove-background returns a transparent PNG. For a new scene behind the car, bria/generate-background accepts a text description or a reference image. For lighting, sky and floor adjustments, picassoia/picassoia-image-editor-pro edits from a plain instruction and accepts up to three reference images. Which one wins depends on the car and the problem, so try the same photo on two of them.
Is it okay to hide scratches or dents in a listing photo?
No. A clean background is fine, but removing or smoothing damage, rust or faded paint misrepresents the vehicle. Listings have to be truthful about the car's real condition. If an edit changes anything on the vehicle itself, discard it and run it again with a prompt that tells the model to keep the car exactly as photographed.
Can I use the same background for every car on my lot?
Yes, and consistency is a big part of the payoff. Reuse the same background description and lock the seed in bria/generate-background so each run starts from the same look. Keep the camera height and angle similar from car to car, because the floor perspective has to match the vehicle, and a mismatch reads as fake even when the wall is identical.
How do I fix the lighting on a dull or harsh car photo?
Use an image editing model and ask for specific changes: brighter, more even exposure, softer reflections, a believable shadow under the tires. Tell it what to keep, such as the paint, wheels and any marks, exactly as in the original. Make lighting changes in a separate pass from the background swap, and compare the output against the raw photo before using it.
Do I need professional photo equipment?
Not to begin with. A recent phone, a steady walk around the car and decent daylight are enough, because the models do the cleanup afterwards. What helps most is the habit: the whole car in frame, the same distance and height each time, no shooting through glass. Equipment improves the raw photo, but framing and consistency matter more.
Why does the car look pasted onto the new background?
Usually it is the shadow or the reflections. A real car sits on a surface, and the floor darkens under it and mirrors a little of the surroundings. If the model skipped the contact shadow, run an edit asking for a soft, realistic shadow under the tires, and reduce reflections of the old scene in the paint. A matching camera angle between the car and the backdrop also helps a lot.
Can I use these photos on marketplaces and my own site?
Technically the files are yours to upload, but each platform has its own photo rules, and some require unedited images or limit what can be changed. Check the current requirements of every marketplace you list on, and keep the original photos in case you are asked for them. Local advertising rules also apply, so ask a qualified professional if you are unsure.
Does this work for motorcycles, vans and trucks too?
The same steps apply to any vehicle with clear edges, including motorcycles, vans and small trucks. Large or oddly shaped vehicles need more distance when shooting so the whole body fits in frame, and spoked wheels or open frames are harder to cut cleanly. Check the edges at full size before you trust the result.
How much does it cost to clean up car photos?
Generations use credits, and the cost depends on the model and the settings you choose, so any number written here would go stale. New accounts start with free credits, which is usually enough to test a few cars. Current plan details are on the pricing page, which is the only place worth trusting for numbers.
Ready to see what your own inventory looks like on a clean background? Open the Picasso IA toolkit, upload one car and compare the edit against the original photo.