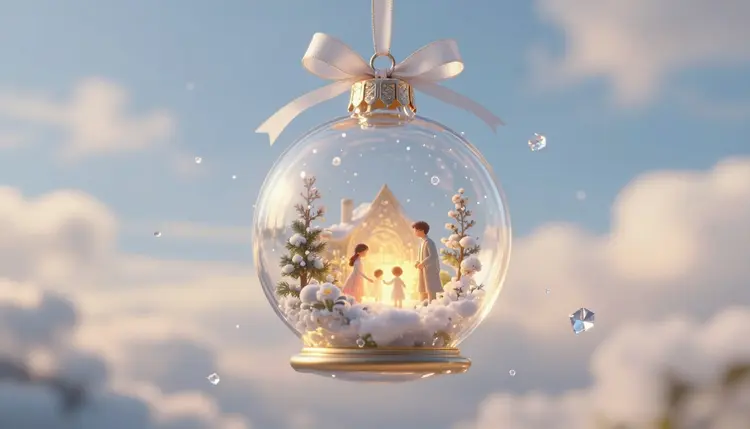
A photo on the fridge gets looked at all month and then forgotten. The same photo reworked as a glass bauble, a paper-cut silhouette or a little felt-style portrait goes on the tree every December and gets handed down. Image models can do that rework: you give them the picture and a short instruction, and they return ornament-ready artwork you can print, order or copy by hand.
A raw photo is a poor ornament. It is rectangular, full of background, lit for a living room and sized for a screen. An ornament is small, round or cut to a shape, seen from an arm's length away, and it has to read at a glance. Turning one into the other used to mean an illustrator or an evening in an editing program. An image editing model takes over the tedious part: it redraws the scene in a chosen style, keeps the people recognizable, and simplifies the busy background into something that suits a small round surface.
Picasso IA runs 502 models in one workspace, the toolkit, so the whole chain happens in one place: an editing model for the restyle, a background removal model for the cutout, an upscaler for print resolution. New accounts get free credits, which is enough to find out whether a photo works as an ornament before you spend anything. The full catalog lists everything if you want to browse other engines.
One boundary first, because it shapes everything below. Use photos of your own family, taken or owned by you, and only with the consent of the people pictured. For children, that means the parents deciding. This page is about keepsakes for your own tree and your own relatives, not about turning strangers or public figures into merchandise.
Style decides whether a photo survives the trip down to ornament size. A group shot with ten faces will turn to mush inside a three-inch bauble, while a single pet portrait works almost anywhere. Match the style to how much is in the picture, then rotate the style words in your prompt until one direction clearly wins.
| Ornament look | Prompt words that steer it | Works best with | Watch out for |
|---|
| Glass bauble scene | miniature diorama, snow globe, warm glow, round composition | One to three people, a house or a pet | Crowded backgrounds; faces shrinking to dots |
| Paper-cut silhouette | layered paper cut, two colors, clean edges, flat shapes | Profiles and side-on poses | Losing likeness when faces are in shadow |
| Felt or plush look | stitched felt, soft fabric texture, simple shapes | Pets, children's drawings, simple outfits | Fine detail such as glasses or jewelry |
| Watercolor medallion | soft ink wash, vignette edge, hand-painted, round frame | Portraits and landscapes | Colors drifting from the originals |
| Flat vector badge | bold outline, limited palette, sticker style | Logos, names, a house front | Looking generic if the prompt is vague |
Two habits save time. Ask for a plain, solid background from the first prompt, because you will want a clean cutout later and a model that invents snowy scenery makes that harder. And generate several variants of each style before judging, since one lucky image tells you little about whether the prompt is sound. The effects page collects preset looks, and skimming it is a quick way to pick up style vocabulary.
This is the route from a camera roll to a file a printer or a crafter can use. It assumes a single photo and an evening.
- Choose the photo and crop it. Pick one where the faces are sharp, lit from the front and large in the frame, then crop in tight so the subjects fill most of it.
- Restyle it with an editing model. Open the toolkit, attach the photo to an editing model such as nano-banana, qwen-image-edit or flux-kontext-pro, and describe the ornament look in a sentence.
- Compare and refine one thing at a time. Generate a few versions, keep the one where the faces still look like your people, and ask for a single change per round: softer colors, simpler background, warmer light.
- Cut it out and clean the edges. Run the winner through bria/remove-background to get a transparent PNG, then check the edges around hair and hats at full zoom before you trust them.
- Upscale and send it to print. Enlarge the file with an upscaling model, export it, and ask your printer or ornament maker what size, format and bleed they want before you order.
Most disappointing results come from the input, not the model. Editing models rebuild a face from the pixels you give them, so a sharp, front-lit photo produces a likeness and a blurry flash snapshot produces a stranger who happens to be wearing the right sweater.
Pick the source with ornament size in mind. Fewer subjects, larger faces and a calm background beat a wide group shot every time. If the photo you love is crowded, crop to the two people who matter most, or make a series of small ornaments, one per person, instead of one overloaded bauble. If the original is old or damaged, repair it first with the steps on the old photo restoration page, and only then restyle it.
Tip: describe the object as well as the picture. A prompt that says only "make this a Christmas ornament" gets you a generic bauble with a pasted photo. A prompt such as "turn these two people into a paper-cut ornament, two colors, plain white background, faces unchanged" tells the model what to keep and what to simplify.
For the prompt itself, name the style, name what must stay (faces, hair color, the dog's markings), and name what can go (background, clutter). Keep one idea per request. If a result drifts, go back one version and change one word instead of rewriting everything.
The first mistake is judging on screen only. A detailed image looks wonderful full-size and turns into a smudge at ornament scale, so zoom out until the picture is the size of a coin and see whether you can still tell who is who. If you cannot, simplify.
The second is skipping the likeness check. Models sometimes smooth a face into a pleasant average, change a smile, or add an extra detail nobody asked for. Put the original and the result side by side and ask a family member, not yourself, whether it is still them. Get that confirmation before anything is printed.
The third is leaving the background decision to chance. If you plan to print on a round ornament blank, a transparent cutout from a background removal model lets the printer or your layout tool place the subject exactly. For flat designs you can also combine the cutout with a pattern from seamless patterns as the backdrop. If the same artwork might also go on a mug or a shirt, the print on demand artwork page covers the common traps.
The fourth is ordering too early. Print specs belong to the printer: sizes, margins, file types, color handling and what happens at the edge of a round blank all differ by shop and by product. Ask first, export second, and order a single test piece before you commit to a batch of gifts.
This is where the approach runs out, so you can plan around it rather than discover it in December:
- Likeness: a model can turn a real face into a pleasant, slightly different one, so every portrait needs a check by people who know the person before it becomes a keepsake.
- Crowds and small faces: group photos lose faces first, and any face smaller than a fingernail at final size will not survive restyling or printing.
- Text and names: lettering on a banner or a name under a portrait is often misspelled by image models, so add names in a layout tool afterward instead of asking the model to draw them.
- Physical shape: the model draws artwork, not an object; it does not know your blank's hole, hanger, thickness or safe margin, and the printer's template does.
- Consent and sensitivity: photos of children, of relatives who have passed away, or of people who never agreed to be used belong with their families' decisions, not with a tool's output.
None of this rules the idea out. It means the model handles the redrawing and a person handles the judgment.
Can AI turn a family photo into a Christmas ornament design?
Yes, as artwork. An image editing model takes your photo plus a short instruction and redraws it as a glass bauble scene, paper cut, felt look or watercolor medallion. What you get is a flat image file. Turning that file into a physical ornament still needs a printer, an ornament maker or your own hands, and each of those has its own requirements for size and format.
Which Picasso IA models work best for this?
For restyling a photo, image editing models such as nano-banana, qwen-image-edit and flux-kontext-pro accept a reference image and an instruction, and they are the natural starting point. For a clean cutout, bria/remove-background returns a transparent PNG. Running the same prompt through two of them costs little and shows which one keeps your family looking like your family.
Do I need the permission of the people in the photo?
Yes. Use photos you own or took yourself, and only of people who agree to it. For children, a parent or guardian should decide. If someone in the picture would be uncomfortable seeing themselves reworked, or the person has passed away and the family has not discussed it, ask first. This page covers private keepsakes for your own family, not strangers or public figures.
How do I keep faces looking like the real people?
Start from a sharp, front-lit photo cropped tight on the faces. Say in the prompt that the faces must stay unchanged, ask for one change per round, and compare each result against the original. If a version drifts, return to the previous one rather than piling edits on top. Then let a relative check the final image, because you may stop noticing small differences.
Can I use a pet photo instead of people?
Pets are often the easiest subject. A dog or cat usually has a clear silhouette, distinctive markings and no privacy concerns, and it reads well at small sizes. Name the markings in the prompt so the model keeps them, and pick a simple style such as felt or paper cut. The pet portraits page goes deeper on this subject.
Is the result ready to print as a physical ornament?
Not automatically. The model gives you artwork, and the printer decides what is printable: dimensions, resolution, file type, margins and how a design wraps or crops on their blank. Remove the background if a cutout is needed, upscale the file, then check the printer's own requirements and order one sample before a batch.
How do I get a clean transparent cutout?
Run the finished image through a background removal model such as bria/remove-background, which outputs a transparent PNG. It handles hair and soft edges well in many cases, but zoom in on the result and look at hats, scarves and fur before you trust it. Asking for a plain background in the original prompt makes the cutout cleaner. The transparent PNG page has more detail.
Can I make a whole set, one ornament per family member?
Yes, and it often works better than one crowded design. Crop each person from a group photo, give every ornament the same style words and background request, and generate them in one session so the look stays consistent. Keep the original photos beside the results, since matching skin tones and hair across the set takes a small amount of checking.
Will old or blurry family photos work?
Sometimes. Restyling needs enough detail to read the faces, so a very soft or damaged photo gives weak results. Repair or sharpen it first, then restyle it. The photo upscaler page explains how to enlarge a low resolution image, but no tool can invent a face that the original never recorded, so keep expectations modest for the worst scans.
How much does it cost to make these ornaments?
Generations are paid in credits, and the cost depends on the model and the settings you pick, so any number written here would age quickly. New accounts get free credits to try the workflow. Current plans are on the pricing page, and the printing or ornament-making cost is separate and set by whoever makes the physical piece.
Ready to try one? Open the Picasso IA toolkit, attach your favorite family photo and see what it looks like as an ornament before this year's tree goes up.