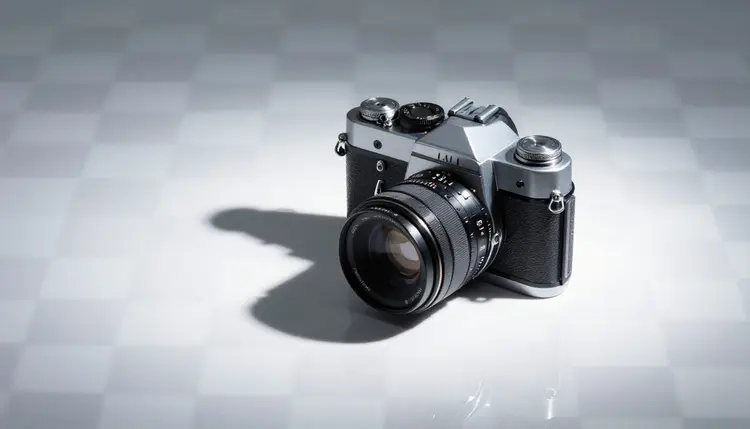
A photo with a plain white background still has a background, one flat color painted behind the subject, and it shows the moment you place it on anything but white. A transparent PNG carries no color at all outside the subject; those pixels are marked see-through in the file itself, so the asset drops onto a slide, a mockup or a colored page as if it never had a background to begin with. That distinction, a file property rather than a look, is what makes an asset usable.
A JPG cannot be transparent no matter how carefully the background was erased, because the format has no channel to store the information. Every pixel in a JPG carries a color, so an "erased" background in JPG is really just painted white, or whatever color the export defaulted to, and it shows as a hard rectangle the instant the file lands on anything else. PNG is different: alongside red, green and blue, it stores a fourth value per pixel, the alpha channel, which records how opaque or see-through that pixel is. A pixel with zero alpha shows whatever sits behind it; a pixel with partial alpha, common at a soft edge, blends a little of both.
This is why a checkerboard pattern shows up in most editors instead of a color: it is the universal signal for "nothing here, see through it," and it only appears when the alpha channel is actually present. If your export tool shows a checkerboard, the transparency is real. If it shows solid white with nothing else, check the file format before you use it anywhere the background matters.
The file earns its keep the moment it stops being a standalone image and becomes a piece of something larger. A presentation slide with a product cutout floating next to a headline reads as designed; the same product with a white box around it reads as a screenshot someone forgot to clean up. A print-on-demand mockup, a shirt or a mug with your artwork on it, needs the artwork with nothing behind it, since the mockup template supplies its own background and any leftover color sits on top like a stain. A website graphic needs to sit on the page's own background color, which changes between light and dark mode on plenty of sites. A sticker sheet needs a cutout clean enough that the die-cut line can follow the subject's actual outline instead of a rectangle.
In each of these cases the file is doing a job a plain photo cannot: sitting inside a layout designed by someone else, on a background it was never told about in advance.
Pro tip: before you call an asset finished, drag it onto the actual background it will live on, the real slide template, the real mockup, the real page color, not a neutral gray canvas in an editor. A soft edge or faint halo that is invisible on gray becomes obvious on a saturated brand color or a busy photo, and that is the test that matters, not how the cutout looks floating alone.
Not every subject cuts out the same way, and knowing the pattern in advance saves a wasted export. This is a rough guide to what a first attempt typically returns.
| Subject type | Typical edge quality | What to zoom into |
|---|
| Simple solid object, box or bottle | Very clean | corners and any curved rim |
| Person with straight, tied-back hair | Clean | hairline against a dark backdrop |
| Person with loose or flyaway hair | Uneven | individual strands near the crown |
| Product with fine mesh or lace | Uneven | small holes that can fill in solid |
| Semi-transparent material, glass or smoke | Genuinely hard | anywhere the background should show through |
A solid object and a tied-back hairline are close enough to solved that most people never re-check them. Flyaway hair and fine mesh deserve a zoom before export, and glass, smoke or sheer fabric are the case where you should expect real time spent, or accept a result that is good rather than perfect.
A single photo forgives a slightly soft edge, because the eye is looking at the whole picture, not hunting for a seam. An asset does the opposite: it exists to sit on top of something else, which makes the boundary between subject and nothing the one part every viewer's eye eventually lands on. A faint halo, a thin line of the old background clinging to the edge, is barely visible against a neutral gray canvas and glaringly visible once that same cutout sits on a saturated brand color, a photograph, or a dark slide background.
Fine detail compounds the problem. A stray pixel of wrong color at the edge of a solid box is nearly invisible; the same stray pixels along a head of hair or a piece of lace multiply into a visible fringe, since there are hundreds of edge pixels instead of a handful. This is the practical reason to check an asset at full zoom against its real destination rather than a thumbnail, which compresses away exactly the detail that gives away a rough cutout.
The process is short, and the same five steps work whether you are cutting out one hero image or building a small library of product assets.
- Upload the source photo. Pick the sharpest version available; a blurry or heavily compressed source limits how clean the resulting edge can ever be, regardless of the model that runs on it.
- Run the cutout. Open the Toolkit, choose a background removal model, and generate the transparent version of the subject.
- Zoom in on the edges against a contrasting color. Place the cutout over black, then over white, and look specifically at hair, fine detail and any spot where the subject's original color was close to its background.
- Place it on the real destination background. Drop the file into the actual slide, mockup or page it is meant for, not a neutral test canvas, since that is the background the edge will actually be judged against.
- Export as PNG. Confirm the export format is PNG, not JPG, since JPG discards the alpha channel entirely and turns the transparent areas back into a solid color no matter how clean the cutout was.
An honest tool page tells you where the file breaks. Five points worth knowing before you build a workflow around cutouts.
- Semi-transparent materials are the hard case: glass, smoke, steam and sheer fabric should let some background through rather than block it entirely, and turning them fully opaque or fully see-through is a plausible mistake for any cutout tool, ours included.
- Always check the edge at full zoom on the real background: a halo invisible on a neutral gray canvas can be obvious on a saturated color, so the actual destination is the only test that counts, not how the file looks alone.
- Batch consistency depends on the source photos, not just the model: a set of product shots taken under matching lighting and against a matching backdrop returns cutouts with matching edge quality; a mixed set of sources returns a mixed set of results.
- Fine strand and lace detail can simplify: individual hairs or the small holes in mesh and lace are the pixels most likely to fill in or blur slightly, since they carry the least contrast information for the model to work from.
- JPG cannot hold the result: exporting a cutout as JPG at any point discards the alpha channel permanently, so the file needs to stay PNG from export through however many tools it passes through afterward.
What actually makes a PNG transparent, rather than just looking like the background is gone?
A transparent PNG stores a fourth value per pixel, the alpha channel, alongside its red, green and blue color, and that value records how see-through each pixel is. A pixel with an alpha of zero shows whatever sits behind it, which is why a genuinely transparent file displays a checkerboard pattern in an editor rather than a solid color. A photo where the background merely looks removed, most often a JPG painted white, has no such channel, so it shows a visible box the moment it lands on anything but that exact shade of white.
Can I get a transparent PNG from literally any photo?
Technically yes, the process runs on any photo, but result quality depends heavily on the subject and the source image. A sharp photo of a solid object against a plain background returns a near-perfect cutout almost every time. A low-resolution, heavily compressed or badly lit photo limits how clean the edge can be, since the cutout can only work with the detail actually present in the pixels you uploaded.
Which subjects are the hardest to cut out cleanly?
Anything genuinely meant to be partially see-through: glass, smoke, steam and sheer fabric, where part of the background should stay visible through the subject rather than be replaced entirely. Flyaway hair and fine mesh or lace come next, since both break into dozens of thin strands or tiny holes rather than one continuous edge. Solid objects and tied-back hair against a plain background are the easy end of the scale.
Do I need to check the file on a specific background before using it?
Yes, and it is the single most useful habit for anyone building assets regularly. A soft edge or faint color fringe invisible against a neutral gray test canvas can become obvious against a saturated brand color or a dark background, so the only test that reliably catches a problem is placing the cutout on the exact background it will sit on before you call it finished.
How is a transparent PNG different from Picasso IA's background remover?
They use the same underlying cutout, but this page is about the deliverable, a file with real alpha transparency ready to drop into other layouts, while the broader background removal workflow covers the wider set of reasons someone might want a subject isolated, including placing it onto a brand-new photographed scene instead of keeping it transparent. If your goal is a reusable asset, the export step, PNG with the alpha channel intact, is the part to get right.
Can I export the cutout as a JPG instead?
You can, but you would lose the point of the exercise. JPG has no channel to store transparency, so any area that was see-through in the PNG gets filled with a solid color, almost always white, the moment you export or convert to JPG. If a downstream tool only accepts JPG, the least-bad option is placing the cutout on the exact background color that tool needs first, then flattening and exporting, rather than converting the transparent file directly and hoping for the best.
How do I keep edge quality consistent across a batch of product photos?
Consistency starts before the cutout, with the photos themselves. A set of products shot under the same lighting, at the same distance, against the same backdrop, gives the model the same kind of edge to read every time, which is what produces matching results. Run the same model and settings across the whole set rather than switching between runs, and spot-check a few images from the middle and end of the batch, since a batch that starts clean can still include a harder subject partway through.
Will hair and fur always look a little rough at the edges?
Loose, flyaway hair and fine fur are genuinely difficult for any cutout process, since they break into hundreds of individual strands rather than one continuous boundary, and some simplification there is a realistic expectation, not a flaw to fix. Tied-back hair, short hair and smooth fur against a plain background fare much better, since there is far less strand detail to reconstruct at the edge.
Can I turn a transparent cutout into a sticker?
Yes, and a clean transparent PNG is exactly the file a sticker workflow needs, since the die-cut line a printer follows is generated from the subject's actual outline in the alpha channel rather than a rectangle. Check the edge at full zoom before printing, since a sticker makes any rough boundary far more visible than the same file inside a slide or a webpage, and a printed sheet is harder to fix after the fact than a digital file.
Is Picasso IA free to try for making transparent PNGs?
New accounts receive free credits, enough to test a handful of cutouts and judge the edge quality on your own subjects before committing to a larger batch. After that, generation uses credits, and current plans are listed on the pricing page. The same credits work across every model in the catalog, 488 in total, so the same account covers cutouts, upscaling and every other edit you might need next.
A photo that already exists on your phone is one upload away from a file you can actually build with, not just look at. Open the Toolkit and export the transparent version before your next slide, mockup or sticker sheet needs it.