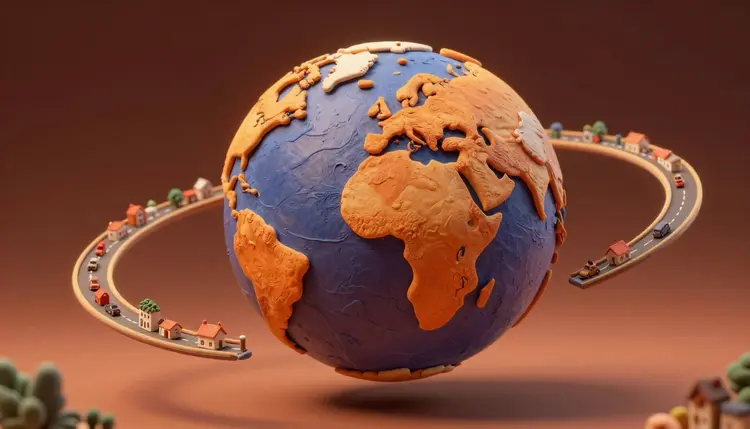
You have seen the shot: a camera starts on one street, rises past the rooftops, the neighborhood, the city and the coastline, and ends on a curved planet against the dark. It used to take a drone, satellite tiles and a compositor. Now you can get the same move from one photo or one sentence, as long as you accept that what comes out is a stylized, generated version of the descent and not a map.
The zoom out works because it answers a question the viewer did not know they had: where is this, really? A street you know becomes a dot on a planet in a few seconds, and that jump in scale is the whole payoff. It is short, it loops well, it captions itself, and it suits an intro, a reveal for a travel or geography channel, a transition between topics, or a personal clip about your hometown.
The traditional recipe is real aerial footage, satellite imagery and a compositor to blend them. The AI recipe swaps that for a ladder of still frames, one per altitude, and a video model that moves the camera between each pair. Picasso IA runs 502 models behind one interface, so you can make the stills with an image model, move between them with a video model and review every stage in the same toolkit. New accounts get free credits, which is enough to try a first descent before you decide whether the idea deserves more. The full catalog lists everything that is available.
There is more than one route from the street to orbit, and they trade control against effort. The first row is the quickest test; the keyframe ladder is the one that gives you a shot you can steer.
| Approach | How it works | Best for | The catch |
|---|
| Prompt only | One text-to-video prompt describes the pull-back from street to space | Testing whether the idea reads | The model invents the street and the planet, so neither matches your place |
| One photo as first frame | Your street photo is the start image and the prompt asks the camera to rise | Making a real place the opening of the shot | Only the first frame is yours; everything above it is invented |
| Keyframe ladder | A start and an end image per clip, one rung per altitude, clips chained | The most control over where each clip lands | More images and more clips to generate and match |
| Multi-shot script | Several shots in one Kling v3 Video generation, each with its own prompt | A single take feel with fewer joins | Less control per shot and a cap on total length |
| Stitched fast clips | Short clips cut together with a speed ramp and a dissolve in your editor | Hiding seams that will not go away | The finishing happens outside the generator |
Three video models in the catalog accept anchor frames, and they differ in useful ways. Kling v3 Video takes a start image and an end image, runs up to 15 seconds, and can script up to 6 shots in one generation. Ray 3.2 takes a start image, an end image or both, but only on 5-second clips, and it can also loop. Veo 3.1 takes an image plus a last frame for 4, 6 or 8 seconds and generates audio with the picture. Check each model page in the collection for the current settings before you plan the ladder.
This is the keyframe ladder, the route that gives you a shot you can steer from one end to the other. It assumes one street photo or one written scene, and some patience at the joins.
- Plan the altitudes. Write the rungs down: street level, rooftop height, the neighborhood, the city, the region, the continent, the planet. A handful of rungs is plenty for a first attempt, and each one needs to look like a higher version of the one before it.
- Generate the keyframes. Make each rung with an image model such as nano banana or Seedream 4.5, keeping the light and the season the same. If you have a real photo of your street, use it as the lowest rung and ask an editing model for the same place from higher up.
- Animate each pair. Open Kling v3 Video, Ray 3.2 or Veo 3.1 in the toolkit, upload the lower rung as the start image and the higher rung as the end image, and prompt a slow, steady pull-back.
- Chain the clips and check every join. The end image of one clip is the start image of the next, so the frames should meet exactly. Regenerate the one clip that wobbles instead of rerunning the whole chain.
- Cut, upscale and label. Join the clips in order, soften the seams, add sound if you want it, and sharpen the result with video upscaling. Then say in the caption that it is generated.
Most of the work is in the stills, because the video model can only interpolate between what you give it. Describe the same place at each altitude with the same light, the same weather and a consistent color story, and name what should be visible: a road, a river, a harbor, a cloud layer. Ask for a high-altitude view, not for a map, and avoid words like satellite photo if you want an image that looks filmed rather than plotted.
For the video prompt, describe the camera and nothing else. Something like a slow continuous pull-back, straight up, steady speed, no rotation, the ground falling away, is enough. Mentioning motion on the ground, such as cars or boats, invites the model to animate things that will not survive the next rung.
Tip: fix the horizon before you fix anything else. If one keyframe is tilted or the next one shows a different time of day, the video model will fake the change mid-clip and the join will jump. Match the light across every rung first, then worry about detail.
Two small habits help. Generate the planet rung last and make it simple, a glowing globe with plausible clouds, since a plain final frame gives the final clip less to get wrong. And render each clip a few times before you judge it, because the same pair of frames can produce a smooth rise once and a drifting one the next.
An Earth zoom out looks like footage, and that is exactly why it needs a label. Nothing here is a satellite pass or a drone flight. The coastline, the borders and the city layout between your street and the planet are plausible inventions, so say so in the caption or the description and do not present the clip as a record of real geography.
Check the current rules of the platform you publish on, since many ask you to disclose AI-generated video and the requirements change. Keep the people question simple too: if your street photo shows neighbors or a readable license plate, crop or replace them, and only use faces that are yours or fictional ones. A home address on a clip you post is worth blurring, and a clip about a real place should never imply things about that place that you cannot support.
This format has clear limits, and most of them show up around the third or fourth rung:
- Geography: the model invents the terrain between rungs, so coastlines, borders and street layouts will not match a map, and the clip is the wrong tool wherever accuracy matters.
- Scale continuity: a road at street level can vanish or change shape at the next altitude, and the longer the descent the more the world drifts from your original photo.
- Seams between clips: light, color and camera speed shift at every join, and hiding them usually takes a dissolve or a speed ramp in an editor.
- Text and labels: city names, signs and map-style captions come out garbled, so add real labels afterward in your editing software instead of asking the model to draw them.
- The final planet: the globe is a stylized one, with plausible continents and clouds rather than accurate ones, so use real imagery for anything educational.
None of this ruins the shot for an intro, a transition or a bit of storytelling. It rules out the clips where somebody might read the picture as a fact.
Can AI make an Earth zoom out video from a single photo?
Yes, with limits. You upload your street photo as the first frame of an image-to-video model and prompt a slow pull-back, and the model invents everything above the ground. That works for a short rise, but for a full trip to orbit you usually need intermediate keyframes, because one clip cannot cover that much scale without the world changing shape along the way.
Which model is best for an Earth zoom out video?
There is no single best, which is why a catalog helps. Kling v3 Video is the most flexible, with a start image, an end image and a multi-shot script. Ray 3.2 is a good fit for short 5-second rungs with both anchors. Veo 3.1 adds generated audio and takes an image plus a last frame. Run the same pair of frames through two of them and keep the steadier camera.
Can I do it from text only, with no photo?
You can, and it is the fastest way to test the idea. A text-to-video prompt that describes a steady pull-back from a street to space will give you a plausible shot. The trade-off is that the street is not your street. If the place matters, make at least the first keyframe from a real photo of it, or from an image model prompted with its details.
How do I make it look like one continuous shot?
Match the frames. The end image of each clip should be the start image of the next, with the same light, the same time of day and a similar camera angle. Use the same camera wording in every prompt, then add a short dissolve or a speed ramp at each join in your editor. The Kling v3 Video multi-shot script can also reduce the number of joins you have to hide.
Will it show my real street and neighborhood accurately?
Only the frame you supply is accurate. Everything the model adds above it, the neighboring blocks, the river, the coastline, is a plausible guess and will not match a map. That is fine for a stylized intro and wrong for anything that claims to show a real place. If accuracy matters, use real aerial or map imagery and keep the AI for the transitions.
How long can the zoom out be?
Per generation, it depends on the model: Kling v3 Video runs up to 15 seconds, Ray 3.2 offers 5 or 10 seconds (anchor frames work on 5-second clips), and Veo 3.1 offers 4, 6 or 8 seconds. A longer descent comes from chaining clips. Pacing matters more than raw length, since a rise that is too slow loses people before it reaches the planet.
Do I need to label it as AI-generated?
You should, and many platforms ask for it. Check the current requirements of the platform where you post, because disclosure rules change and differ between services. Beyond the rules, a short line in the caption saying the shot is generated and stylized keeps viewers from taking the coastline or the city layout as real footage, which is the honest way to share this kind of clip.
Can I reverse it into a zoom in?
Yes, two easy ways. Reverse the finished clip in your editor, or swap the start and end images before generating so the camera falls from orbit toward your street. The second option usually looks more natural, since the model animates a descent on purpose instead of playing a rise backward, and you can keep the same keyframes for both versions of the shot.
Can I add sound to an Earth zoom out video?
Veo 3.1 generates audio with the picture, and Kling v3 Video has a native audio option. You can also add sound afterward: a low wind swell, a rising tone or a score. See adding sound effects to silent AI videos and background music for videos for the workflow.
How much does it cost to make one?
Video costs credits, and the amount depends on the model, the duration and the settings you choose, and a ladder means several clips plus the stills. New accounts get free credits to start. Current plans and credit costs are on the pricing page, which is the only place worth trusting for numbers, since anything written here would be out of date quickly.
Your street is a few rungs from orbit. Open the Picasso IA toolkit, generate the first keyframe and start the climb.