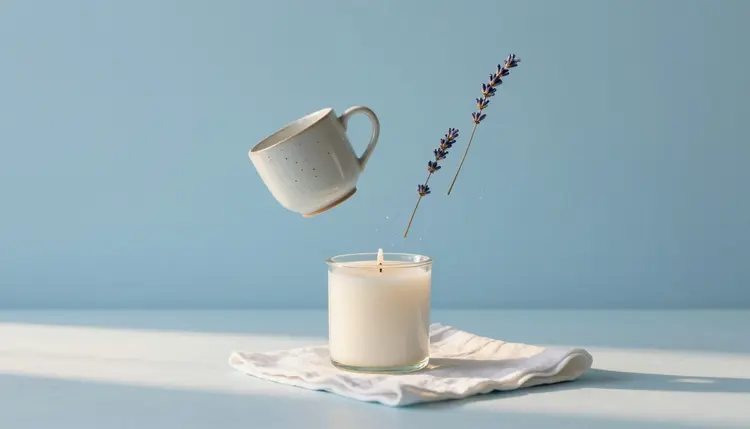
A handmade mug photographed on a kitchen counter next to a pile of mail tells a buyer very little. The same mug on a sunlit shelf, beside a folded linen cloth, tells a small story. Building that second photo used to mean props, a window and an afternoon. With AI you start from one plain photo of the real item, generate the scene around it, and then inspect the product against the original before anything reaches your listing.
A buyer scrolling a marketplace cannot pick up your work. They cannot feel the weight of the mug or smell the candle. What they get is a thumbnail, and a thumbnail of an object on a white sheet answers one question only: what does it look like. A lifestyle scene answers the next ones: how big is it, where would it live in my home, does it fit the mood I am going for.
Handmade sellers usually have the hardest version of this problem. You make the product, photograph it, write the listing and ship the order, all alone, so the styled shoot with shelves and soft window light is the part that gets skipped. AI turns that part into an edit: you keep the real photo of the real item, and the model builds a different setting around it.
Picasso IA puts 502 models behind one workspace, 212 of them in text-to-image, and the ones that matter here are editors and background tools rather than pure generators. Browse them in the full catalog or open the toolkit, where every model runs. New accounts get free credits, enough to test one product before you decide anything.
A text-to-image model that invents a candle from a sentence gives you a nice candle that you do not sell. What you need are tools that start from your photo. The table sorts the options by what each one protects and where it can let you down.
| Approach | Best for | Watch out for |
|---|
| Generate Background (bria/generate-background) | Keeping your item and swapping the scene from a text description or a reference photo | Light on the scene can differ from light on the item, so check edges and shadows |
| PicassoIA Image Editor Pro | Prompted edits on up to three reference images, one change at a time | Loose wording can alter details of the item along with the scene |
| Nano Banana Pro (google/nano-banana-pro) | Rebuilding a whole scene around up to 14 reference images, up to 4K | Most creative freedom, so also the most chance the item drifts from the real one |
| bria/remove-background, then composite | A clean cutout first, scene second | An extra step, and fringe, lace or loose threads need a close look |
| Plain text-to-image | Mood boards and scene ideas for planning a shoot | The object it draws is not your object, so it never belongs in the listing itself |
For most handmade sellers the sensible order is the first two rows: Generate Background when the plain photo is good and only the setting must change, PicassoIA Image Editor Pro when you want to adjust the result in small spoken steps. Reach for Nano Banana Pro when you want a richer scene, such as a styled table with several props, and be ready to compare the result closely with your original.
This is the workflow that ends with a scene you can defend, not a folder of pretty images of something you do not sell. It assumes a phone, a window and the product itself.
- Take one honest photo. Shoot the real item in daylight, from the angle you would use in the listing, sharp and unobstructed. This photo is the source of truth for everything that follows.
- Isolate the item if needed. For a clean cutout, run the photo through bria/remove-background in the toolkit. If the original background is already simple, skip this step.
- Generate the scene. Pick Generate Background, upload the photo and describe the setting: a pale wooden shelf, soft window light, a folded linen cloth. Generate two or three variants so you can compare them.
- Refine in small steps. Send the best result to PicassoIA Image Editor Pro and change one thing per prompt: warm the light, remove a prop, shift the shadow. Say what must stay the same.
- Compare against the real item. Put the result next to your original photo and check color, size, shape, texture and the number of pieces. Anything that differs goes back for another pass, or the scene is discarded.
The prompt has two jobs, and beginners only write the first: describe the scene, and describe what must not change. A scene prompt on its own invites the model to improve your product. Add the guard sentence every time.
A good scene prompt names the surface, the light, the mood and two or three props, in plain words: a pale oak shelf, low afternoon sun from the left, a folded white linen cloth and one dried lavender sprig, calm and warm. A good guard sentence is short and literal: keep the mug exactly as in the photo, same glaze, same shape, same size, do not add text or logos.
Think about the buyer when you pick props. A candle beside a book says cozy evening, a mug beside a breakfast tray says morning. The product photography page goes deeper on lighting vocabulary, and the mockups page covers placing flat work, like prints and cards, on frames and walls.
Honesty check: the listing photo has to show the item you actually sell. If the AI scene changes the glaze, the stitching, the size or the number of pieces in the set, the buyer receives something that does not match the picture, and no pretty background is worth a return or a bad review.
Keep one plain shot of the item alone in the listing too, next to the lifestyle scenes. It lets a buyer see the product without styling, and it is your own reference for checking the generated versions.
The first mistake is starting from a poor source photo. A blurry, dark or heavily shadowed original gives the model nothing solid to protect, so it fills in the gaps with guesses. Fix the source before you generate anything, and an upscaler from the catalog can help with a soft image, but it cannot invent real detail.
The second is changing too much at once. A single prompt that swaps the surface, the light, the props and the camera angle gives results you cannot steer. Change one thing, look, then change the next. The third is trusting the first result. Models are good at plausible and sometimes careless about exact, so a handle that is a little thicker or a rim that is a little wider will not announce itself unless you compare.
The fourth is making every photo from the same scene. Five images of the same shelf look like one image, so vary distance, surface and props, and include one close detail shot. The fifth is careless people: if a scene shows a person, it must be fictional, never a real identifiable one, and any hand needs a look for malformed fingers.
This workflow is strong for a ceramic mug or a jar candle, and weaker for several kinds of handmade goods. These are the specific places where you will spend more time fixing than saving:
- Exact color and finish: a glaze, a dye or a hand-painted gradient can shift under a new scene's light, and buyers judge handmade color closely, so compare against the original in daylight.
- True scale: a model happily makes a ring look like a bracelet next to a prop, so choose props with a known size and never let the scene exaggerate the item.
- Text and logos on the item: stamped names, embroidered words and label art often come back warped, so check every letter or leave the item untouched with a simple background.
- Glass, metal and fine texture: transparent glass, polished silver, lace and crochet carry reflections and detail that backgrounds can break around the edges.
- Platform rules: marketplace policies on AI-generated or altered imagery change over time and differ by platform, so read the current requirements before you upload, and disclose what the platform asks you to disclose.
None of this means skipping the tool. It means the first photo must be good, the last check must be done by you, and anything you cannot make truthful should be shot properly in real life.
Can I use AI-generated photos in my Etsy listings?
That depends on the platform's current requirements, which change and which this page cannot quote reliably. Read the marketplace's own seller policy and any rules on AI-generated or edited images before you upload, and follow whatever disclosure it asks for. Whatever the rules say, the safe baseline is the same: the photo must show the item you actually sell, so start from a real photo of your product and change only the setting.
Is it okay to change the background of my product photo?
Changing the setting is fine in principle, since lifestyle photography has always staged products with props and surfaces. The line is whether the buyer still sees the real item. Keep the color, size, shape and finish faithful to what you ship, and do not show things that are not included, such as extra pieces, accessories or a larger size. Also check the platform's current requirements for edited images.
Which model is best for handmade product lifestyle scenes?
There is no single winner, which is why a catalog helps. Generate Background is built to keep your subject and swap the scene from a description or a reference photo. PicassoIA Image Editor Pro handles prompted edits on up to three images. Nano Banana Pro accepts up to 14 references and renders up to 4K, so it suits richer scenes. Try the same photo in two of them and keep whichever protects the product better.
Do I need a professional photo to start?
No, but you do need a clear one. A phone photo taken in daylight, in focus, with the whole item visible and no heavy shadows is enough, because the model builds a new setting around it. Where a poor photo hurts is detail: a blurry or dark original gives the model nothing solid to preserve, so it guesses.
How do I keep the product looking like the real item?
Three habits help. Start from your real photo rather than a text prompt, so the item is not invented. Add a guard sentence to every prompt that lists what must stay the same, such as glaze, shape and size. Then compare the result with the original at full size, checking color, proportions, texture and the number of pieces. If anything differs, redo the edit or drop the image.
Can I make a whole set of listing photos in the same style?
Yes. Reuse the same scene wording, the same surface and the same light across all your products, and lock a seed in models that offer one, such as Generate Background, so the look stays consistent. For a series with a recognizable style, keep one finished scene as a reference image and feed it to an editor.
Can I add a person holding or using my product?
You can show a fictional person, never a real identifiable one, and you should look hard at the result. Hands are the classic failure: extra fingers, odd joints and wrong proportions that a buyer notices at once. For many handmade items a scene without people, with a familiar prop for scale, is safer.
What size and aspect ratio should my listing photos be?
Check the platform's current image requirements, because recommended sizes and ratios change and this page cannot quote them reliably. On the Picasso IA side, the editors offer common ratios such as 1:1, 4:3, 3:2 and 16:9, and Nano Banana Pro renders at 1K, 2K or 4K, so you can match what the marketplace asks for.
How much does it cost to make listing photos with AI?
Every generation costs credits, and the amount depends on the model and the settings you choose, so a number written here would go stale. Editing a single image sits at the lower end of the catalog compared with video or 3D work. New accounts get free credits to try one product, and the current plans are listed on the pricing page, which is the only place to trust for numbers.
Can I show my product in a color or size I do not actually make?
No. Showing a variation you do not sell is exactly what turns a helpful scene into a misleading listing. Use AI for the setting around the item, not for the item itself. If you want to test a new colorway before making it, do it on a private mood board, then photograph the real product once it exists, and use that photo for the listing.
Open the Picasso IA toolkit, upload one plain photo of your best seller and see which scene fits it before you book a single prop.