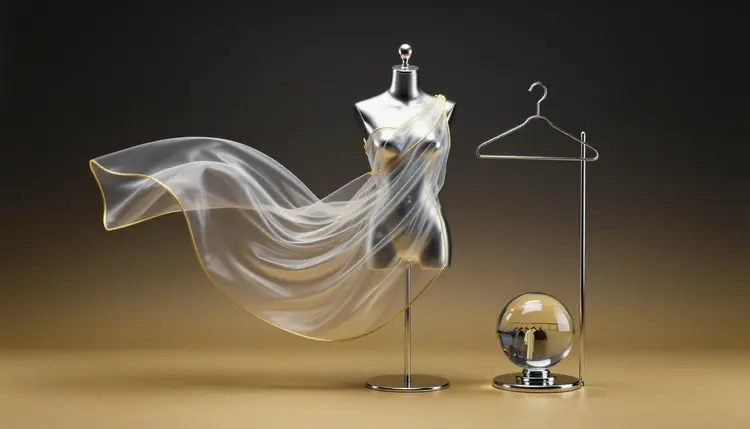
A lookbook used to mean a photographer, a model, a studio day and a rail of garments steamed within an inch of their lives. You can now start from what you already have: a sample photo of each piece and one synthetic model. Dress the model in the pieces, put the looks in a consistent setting, and you hold a draft collection to review long before anything is booked.
The lookbook is rarely the first thing a small label needs. It is the thing you need when you are still deciding: which pieces belong together, which colorway leads, whether the collection reads as one idea or three. Answering that with a real shoot means paying for the answer. Answering it with a draft means you find out the denim and the linen fight each other while the samples are still in a box.
Picasso IA puts 212 text-to-image models and the try-on and editing tools behind one workspace, the toolkit, so the same session can generate a model, dress her and restyle the scene. New accounts get free credits, enough to build a first look and see whether the approach suits your pieces. If you only need a single outfit on a single person, the virtual try-on for outfits page covers that narrower case; this page is about a whole collection that has to hang together.
A lookbook is four small jobs, and different models are better at different ones. Treat them as separate steps instead of asking one prompt for everything.
| Job | Model to try | What you give it | Watch for |
|---|
| Make the synthetic model | seedream-5-pro or nano-banana-pro | A text description of an invented person | Keep the same description for every look |
| Dress the model in your pieces | p-image-try-on | A model photo plus up to six garment photos | Flat-lay photos work best, busy photos need a prompt |
| Set the look in a scene | nano-banana-pro | The dressed image plus reference images | Background changes can alter the garment |
| Change one detail | nano-banana-pro | The look plus one instruction | Ask for a single change per run |
| Sharpen for review | An upscaler from the catalog | The finished look | Upscaling sharpens flaws as well as fabric |
p-image-try-on swaps clothing while keeping the face, pose and body shape of the person photo, and it returns the result at the resolution you uploaded. It takes several garments in one run, so a top, trousers and a bag can arrive together as one outfit. nano-banana-pro accepts up to 14 reference images alongside a prompt and renders up to 4K, which is what you want for the scene and the finishing touches.
This is the order that keeps the collection consistent. It assumes you have a photo of each piece, flat or on a hanger, shot in decent light.
- Create one synthetic model. Describe an invented person in a text-to-image model such as seedream-5-pro: build, hair, a neutral standing pose, plain background. Keep the winning image as your base.
- Prepare the garment photos. One clear photo per piece, the garment fully visible, on a plain surface. Crop out clutter so the try-on model has nothing else to copy.
- Dress the model. Open p-image-try-on, upload the model photo as the person image and the garments as references. Start with one look of two or three pieces and check it before building the rest.
- Place every look in the same scene. Send each dressed image to nano-banana-pro with one shared scene description and the same reference image, so lighting and background match across the whole set.
- Sequence and review. Lay the looks out in running order, the way a lookbook would be paged, and note which pieces carry the collection and which ones vanish.
The easiest way to spot a faked lookbook is that every page has a different person and a different light. Consistency is the actual craft here, and it comes from three habits. Reuse the same model photo as the person image for every try-on run. Reuse one scene description word for word, changing only the garment. And fix the framing: same crop, same distance, same aspect ratio, so the pages feel shot on one day. The same logic drives consistent AI characters, where one reference image anchors everything that follows.
Shoot your own sample photos before you generate anything: the same plain surface, the same daylight, the garment flat and unwrinkled. A try-on model can only copy what the photo shows, so a creased sleeve in the sample becomes a creased sleeve on the model.
Vary the pose with intent. The reference pose input on p-image-try-on is experimental and can fail on some seeds, so if it misbehaves, generate a second model photo in the pose you want and use that as the person image instead. For product-only pages in the same book, a separate pass through AI product photography keeps flat-lays and worn looks in a matching style.
Most failures come from asking too much of one step. Generating the model, the outfit and the street scene in a single prompt gives you a different person every time and a garment the model has reinterpreted. Splitting the work fixes most of it.
A quieter mistake is changing the brief halfway through. If look three gets a warmer light and look five a cooler one, nobody will say why the book feels uneven, they will just feel it. Write the scene description once, paste it unchanged, and only edit it when you deliberately start a new chapter of the collection.
The other common mistake is trusting a flattering image over the real sample. If the generated jacket looks better than the jacket in the box, the lookbook is no longer showing your product. Keep the real sample next to the screen and compare cuts, colors and trims on every look. Third, people skip the review of small details: buttons, seams, zip placement and pocket depth are exactly where a try-on result drifts from the garment photo.
This works as a planning draft. It does not replace the shoot for a collection you will sell from. Here is where it stops:
- Fabric drape: a try-on model guesses how cloth falls from a flat photo, so heavy wool, silk and stiff denim can all end up hanging the same way. It cannot tell you how a real piece moves.
- Print scale: large graphic prints and fine patterns get resized and sometimes repeated or blurred. Check that the print on the render is the print on the sample, at the right size.
- Synthetic models only: use an invented model or a photo of someone who agreed to be in it. Do not dress a real, identifiable person without their consent, and keep it clear to your audience that the models are generated.
- Fit and sizing: the garment is fitted to the body in the photo, so a render says nothing about how a size 8 or a size 16 will sit. It is not a size chart.
- Selling truthfully: if the lookbook feeds a store page or a wholesale deck, the pictures must show the item as it is. Check each platform's current requirements for AI-generated imagery before you publish.
Can I make a fashion lookbook from phone photos of my samples?
Yes, with conditions. A clear photo of each garment, fully in frame, on a plain surface and in even light is enough for p-image-try-on to read the piece. Shadows, wrinkles and cluttered backgrounds get carried into the result, so a few minutes spent flattening the garment and wiping the background saves a lot of rerolls later.
How many garments can I put on the model in one run?
p-image-try-on recommends up to six garment images per run and supports more, and it has a turbo option that is not recommended past four garments. In practice, two or three pieces per look give the cleanest results and are closer to how a lookbook page works anyway. For a larger outfit, build it in stages and check each stage before adding the next.
Is it okay to use a real person as the model?
Only if that person is you or someone who has clearly agreed. For a collection, the safer path is a synthetic model: describe an invented person in a text-to-image model and reuse that image as the person photo for every look. Never dress a real, identifiable person you have no permission from, and do not present generated models as real ones.
How do I keep the same model and style across every look?
Reuse the same model photo as the person image for every try-on run, and reuse one scene description word for word when you place the looks. Fix the crop and aspect ratio too. Consistency comes from repeating the inputs, not from hoping the model remembers, because each run starts fresh from whatever you hand it.
Will it show how the fabric really drapes?
Not reliably. The model infers drape from a flat photo, so it gives a plausible fall, not the physical behavior of your cloth. Heavy, fluid and stiff fabrics can look alike in the output. Treat it as a way to judge silhouette and styling, and use a real sample or a short real shoot to judge movement.
Can I use these images to sell the clothes?
You can use them as draft and planning material freely. For product pages, marketplaces or wholesale decks, the picture has to be truthful about the item, and each platform has its own rules about AI imagery that change over time, so read the current requirements before you publish. When in doubt, use generated looks internally and real photos for the listing.
Which model is best for a fashion lookbook?
No single model does all of it, which is why the page splits the work. p-image-try-on dresses the model, nano-banana-pro handles scenes and single edits, and a text-to-image model such as seedream-5-pro makes the synthetic model. The full catalog lists the 212 text-to-image models if you want to test another look for the base model.
Can I change the colorway of a piece without a new sample?
Often, for a draft. Send the dressed look to nano-banana-pro and ask for one change, such as the same jacket in dark green. It works well for judging whether a colorway belongs in the collection. It is a visual guess, so match the final color against real fabric swatches before you order anything.
What resolution do the finished looks come out at?
p-image-try-on returns the image at the resolution of the person photo, so a larger model photo gives a larger result. nano-banana-pro renders at 1K, 2K or 4K. If a page needs more detail for a print piece or a large screen, run the image through an upscaler, and check the fabric and print again afterward.
How much does it cost to build a lookbook?
Each generation costs credits, and the cost depends on the model and the settings you pick, so a number written here would go stale. New accounts get free credits to try a first look, and the current plans are on the pricing page, which is the place to check real numbers.
Ready to see your pieces together? Open the Picasso IA toolkit, create your model and dress the first look from your sample photos.