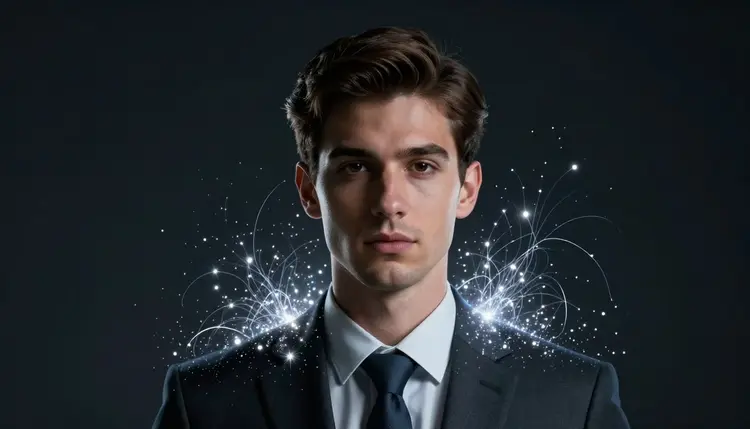
A good headshot used to mean booking a studio, picking a day when your skin was cooperating, and paying for an hour you only needed ten minutes of. AI headshots start from photos you already have on your phone. You upload a few selfies, the model learns your face from them, and you generate a professional portrait against whatever background the job calls for, without ever renting a room with a grey backdrop.
Why a Real Reference Photo Beats a Text Prompt Alone
Typing "professional headshot of a woman in her thirties" into a text-to-image model produces a face, but not your face. It invents a stranger who fits the description. What makes an AI headshot look like you is starting from real photos of you and asking an editing model to change the setting, lighting and attire while preserving the person.
That distinction, generating a face from words versus restyling a face from a photo, is the whole difference between a novelty portrait and something you would put on a CV. On Picasso IA, headshot generation happens in the Toolkit with an editing model such as FLUX Kontext, nano banana or Seedream, which accept a reference photo plus an instruction. The reference photo carries your bone structure and skin tone; the prompt only carries what you want to change.
This is also why one selfie is a weaker starting point than two or three. A single photo gives the model one angle to work from and it has to guess at what the camera did not capture. A short burst, even three phone photos thirty seconds apart, gives it enough information to hold your likeness steady across a full set of poses.
The output headshot is only as good as what you feed it, and a good source selfie takes nothing more than a phone and a window. Three things matter most: light, angle and resolution.
Light should be soft and in front of you, not behind you. Stand facing a window on an overcast day, or a bright window with the curtain half drawn, and you get even light without the harsh shadows a ceiling bulb throws under your eyes and nose. Backlighting, the light source behind you, is the single most common reason a source photo comes back muddy, because the model has to guess at details the camera never recorded.
Angle should be close to straight on, with your face filling a reasonable share of the frame. A photo taken from far across a room, cropped down later, has too few pixels of actual face detail for the model to reconstruct convincingly. Get close enough that your eyes, eyebrows and skin texture are clearly visible before you take the shot, not after you crop it.
Resolution follows from the first two. A recent phone camera in good light already produces more detail than most models need, so there is rarely a reason to hunt for a better camera. What kills it in practice is motion blur, heavy compression from messaging apps, or a photo that started life as a video call screenshot.
Pro tip: take your reference selfies in the same session, same light, same day. Mixing a bright outdoor selfie with a dim indoor one gives the model conflicting information about your skin tone and shadows, and the generated set will show it as inconsistent color across otherwise similar poses.
Once the model has a reliable read on your face, the background and outfit do most of the work of signaling context. A studio grey backdrop reads differently than a sunlit office, and neither is objectively correct, they just fit different situations. The table below covers five presets worth trying.
| Preset | Best for | What to ask for |
|---|
| Studio grey backdrop | Corporate, finance, legal profiles | Seamless grey background, soft key light, minimal shadow |
| Soft office blur | Startup and tech LinkedIn photos | Blurred modern office in the background, natural window light |
| Outdoor natural light | Coaching, academia, real estate agents | Blurred greenery or building facade, golden hour light |
| Neutral gradient | Speaker bios, agency and creative profiles | Dark navy or charcoal gradient background, rim light |
| Blazer swap | Fast wardrobe change over your own top | Add a tailored blazer in navy or black, keep the collar of my shirt visible |
Attire changes are worth testing separately from background changes, because asking for both at once gives the model more freedom to drift from your likeness. A blazer swap over whatever top you already wear in the reference photo tends to look the most convincing, since it only replaces the outer layer instead of inventing a new outfit.
If your reference photo has a cluttered background, a dedicated pass through background removal first can give the headshot model a cleaner starting point.
A single generated headshot is a gamble. A set of six or eight is a decision. Generating a batch means you choose the best result instead of accepting the first attempt, with variety for the places a headshot gets used, a tighter crop for a directory, a slight smile for LinkedIn, a neutral look for a press kit.
Consistency across that set matters as much as quality within any one image. If the third headshot looks like a different person than the first, the set stops feeling usable together. Keeping the same reference photos, background preset and instruction across every generation keeps face, skin tone and proportions stable. The same technique is covered in more depth in consistent AI characters, which applies to a person as much as to an illustrated one.
Expression is the easiest variable to change without breaking consistency. Ask for a confident closed-mouth look in one pass, a warmer half smile in another, and a neutral look in a third, holding the reference photos, background and outfit fixed. That gives a genuine choice instead of eight near-identical images.
A headshot is a small promise: this is roughly what the person looks like. AI headshots keep that promise well, but only within limits worth knowing before you rely on one.
- Not for identity documents: a passport photo or a background check photo has to match strict, literal appearance standards that no restyled portrait satisfies, so keep AI headshots to marketing and professional use, never to anything an official agency will scrutinize.
- Hands and ears can render oddly: these are the parts editing models still struggle with most, so a headshot with a hand near the face or an ear at an unusual angle deserves a closer look before you pick it.
- A human should pick the final image: generate the batch, then have a person, ideally not just you, choose the one that actually looks like you on a normal day, since it is easy to favor the flattering result over the accurate one.
- Consent comes first for anyone but yourself: never generate a headshot of a coworker or public figure from their photo without asking them, because the reference photo and the resulting portrait both involve someone else's likeness.
- Heavy retouching drifts from you: pushing the same photo through extra editing passes, smoothing skin further, sharpening features, tends to accumulate into a face that looks polished but noticeably less like the reference it started from.
None of this makes AI headshots less useful for what they are for, a fast way to get a professional portrait when a photographer is not worth booking. It means treating the output as you on your best day, not a record of your appearance.
The full process, from opening the Toolkit to exporting a finished set, usually takes fifteen to twenty-five minutes, most of it spent picking the winning image rather than waiting on generation. Credits are only spent per generation, and you can check the cost of a run on the pricing page before you start.
- Upload two or three reference selfies. Take them in the same light and session, facing a window, close enough that your face fills a good share of the frame, and avoid sunglasses, a hat or heavy makeup that differs from your everyday look.
- Choose a background and attire preset. Pick one combination, studio grey with a blazer, or outdoor light with your own top, and commit to it for the whole batch so the results stay comparable.
- Generate a batch, not a single image. Run six to eight generations with the same reference photos and preset, varying only the expression instruction, so you end up choosing rather than settling.
- Pick and refine your favorites. Shortlist two or three, and if one is close but not quite right, regenerate just that one with a small adjustment instead of starting the batch over.
- Upscale and export at print resolution. Run the final choice through an upscaling model before downloading it, since LinkedIn, a directory and a printed badge all benefit from more resolution than a phone preview needs.
Do I need a professional camera to get a good AI headshot?
No. A recent phone camera in good natural light produces more than enough detail. What actually determines quality is light and angle, not the camera, so a well-lit selfie facing a window will outperform a photo shot on better hardware in poor or backlit light.
How many reference selfies should I upload?
Two or three from the same session works better than one. A single photo shows the model only one angle and one lighting condition, and it has to guess at the rest. A short burst taken thirty seconds apart, same light, same outfit, gives it enough consistent information to hold your likeness steady across the set.
Will the AI headshot actually look like me?
It should, closely, if the reference photos are clear and well lit. The model restyles a real photo of your face rather than inventing one, so bone structure, skin tone and features carry over. Where it can drift is fine detail under heavy retouching, so review the final image against your everyday appearance rather than picking the most flattering one automatically.
Can I use an AI headshot on LinkedIn or a company website?
Yes, for professional and marketing purposes an AI-generated headshot is treated like any other photo you choose to represent yourself with. The category to avoid is identity documents, passports and background checks, which have strict literal appearance requirements a restyled portrait is not meant to satisfy.
Which models work best for headshot generation?
Editing models that accept a reference photo plus a text instruction are the right family, since they restyle a real face rather than generating one from scratch. On Picasso IA that means FLUX Kontext, nano banana and Seedream as common starting points, with 488 models in the catalog to compare alternatives on the same photos.
Can I generate headshots for my whole team at once?
Yes, though each person needs their own reference photos and generation, since the model restyles one face at a time. What you can standardize is the preset, the same background and attire choice for everyone, which is what makes team headshots look like they belong together.
What should I avoid in my source selfie?
Avoid backlighting, the light source behind you rather than in front. Avoid sunglasses, hats and heavy filters, since they hide details the model needs. Avoid a photo cropped down from something taken far away, since it lacks the detail a close, well-lit selfie captures naturally.
Can AI headshots be used for a passport or ID photo?
No. Identity documents require a literal, unedited photo that meets specific government standards for framing, expression and lighting, and an AI-restyled portrait does not qualify, however accurate it looks. Reserve AI headshots for LinkedIn, a CV or a speaker bio, and use an unedited photo for anything an official agency checks.
How do I get a consistent look across multiple angles or expressions?
Hold the reference photos, background preset and outfit instruction fixed, and only change the expression wording between generations. That is what keeps face, skin tone and proportions stable across a batch, so the final set reads as one person, not several who happen to look similar.
Is Picasso IA free to try for headshots?
New accounts get free credits, enough to generate a first batch before spending anything. After that, each generation uses credits, and current plans are listed on the pricing page. There is no separate headshot tier; the same credits work across image, video, audio and 3D.
Your reference photos are already on your phone, and the first batch costs nothing but a few minutes. Open the Toolkit and generate your first set of headshots before you decide whether it belongs on your profile.