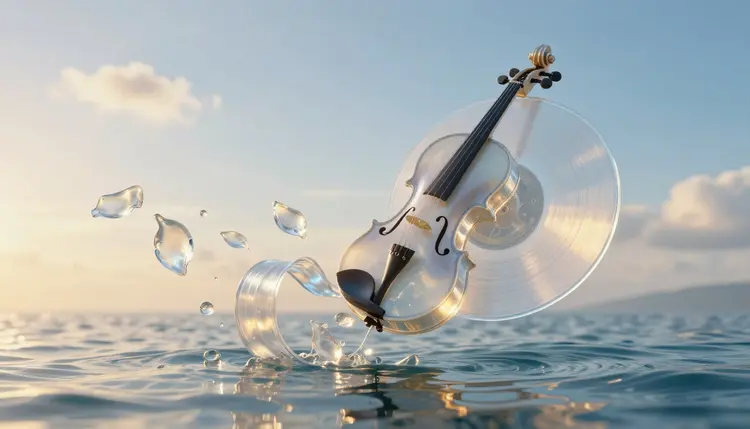
A music visualizer used to mean bouncing bars on a black screen. With an audio-to-video model you can ask for something else: upload the track, add your cover art or describe a scene, and the model generates a short video whose visuals respond to the sound. It is looser than a classic visualizer and a lot more painterly, and this page covers how to get the most out of it.
Most independent musicians release audio and nothing else. Feeds and video platforms want something to look at, though, and a static cover image on a YouTube upload is the weakest version of a release. Hiring an animator for every single is not realistic.
An audio-to-video model works differently from a template tool. Instead of mapping loudness to the height of a bar, it reads the sound and invents moving visuals around your input. Feed it your album artwork and the artwork itself starts to move. Feed it a description of a flooded cathedral at dawn and it paints that scene, shifting with the rhythm and mood of the audio.
On Picasso IA the model for this is lightricks/audio-to-video. It takes an audio file (wav, mp3, flac, ogg or m4a), plus an image used as the first frame or a text prompt, or both, and it has a guidance scale setting that trades prompt fidelity against how freely it interprets the sound. It lives in the toolkit next to the other video, image and music models, which matters because a visualizer is rarely one step. You often want to make the cover art first, maybe the track too, and polish the final clip afterwards.
New accounts get free credits, so you can test a direction before you commit. Generation costs credits and the amount depends on the model and the settings, so check the pricing page for current numbers.
There is no single correct pipeline. The right route depends on whether you have artwork and how much control you want over the camera. This table compares the options you can run in the toolkit, plus the one you cannot.
| Approach | What drives the motion | Best for | Watch out for |
|---|
| Audio-to-video with a cover image | The audio file, with your image as the first frame | Album art that comes alive, release teasers | Motion follows the mood and rhythm loosely, not frame by frame |
| Audio-to-video from text only | The audio file and a written scene | Abstract loops, mood reels, lyric backdrops | Every clip can look different, so a series needs a fixed style phrase |
| Image-to-video model, track added later | Your prompt only (wan-2.7-i2v, ltx-2.3-pro, seedance-2.0) | Precise camera moves and subject motion | No audio input, so you line up the cut to the beat yourself in an editor |
| Generated track, then audio-to-video | A music model's output feeds the visual model | A fully original clip when you have no recording | Two generations to pay for and two sets of settings to tune |
| Waveform or spectrum bars | Real audio levels, frame by frame | Podcast clips and lyric-free audiograms | Not a toolkit feature, so use a dedicated visualizer app for this look |
A practical split: the first row when you own a recording and artwork, the second for atmosphere, the third when a controlled camera move matters more than reaction to sound. Each model page in the all-models catalog lists its inputs, so check what it accepts.
This is the shortest route from a finished track to a clip you can post.
- Prepare the audio. Export the section you want visualized as wav, mp3, flac, ogg or m4a. A short, strong excerpt such as a chorus or a drop usually beats the whole song, because the clips these models produce are short.
- Make or choose the first frame. Use your cover art, or generate a new image in the toolkit with a text-to-image model such as nano-banana-pro. Keep it uncluttered, with one clear subject, so the motion has something to attach to.
- Open audio-to-video and add your inputs. Pick lightricks/audio-to-video, upload the audio, add the image, and write one or two sentences about how the scene should move, for example slow drifting camera, petals lifting on every beat.
- Generate and compare. Run the clip a few times with a different prompt or guidance scale. Higher guidance follows your words more closely, lower guidance lets the model react to the sound more freely, so try both ends before you judge it.
- Finish in your editor. Cut the best takes to the structure of the song, add your title card, and place the original full-quality audio over the video. Export in the shape each platform wants, after checking its current requirements.
If you do not have a recording yet, generate one first. The music models in the toolkit, including lyria-3, music-2.6, stable-audio-2.5 and music from elevenlabs, produce tracks from a text description, and the result can go straight into step one. The use-case page on AI music videos covers the longer-form version of this workflow.
The audio does part of the work, but your words decide what kind of motion you get. A prompt that only names a subject, like a violin on the sea, says what to draw and nothing about how to move. Name the motion, the camera and the energy instead.
Describe motion in verbs and tie it to the music: petals lift on each drum hit, light pulses slowly under the bass, the camera glides forward through fog. A slow ambient piece wants drifting, floating, blooming. A fast breakbeat wants flashing light and objects snapping into place. Match the vocabulary to the track and the clip feels intentional.
Write the prompt for the mood of the track, not for the lyrics. The model reads sound, not meaning, so a line about a lover leaving does nothing, while slow rain on a window at night, camera barely moving gives it a feeling it can follow.
Three mistakes show up again and again. A first frame stuffed with detail gives the model nothing to isolate, so the motion turns into shimmer. Asking for exact synchronization, such as a flash landing on the snare at one minute ten, fails because the model approximates rhythm. And skipping the style phrase lets a series of clips wander: repeat the same sentence about palette and lighting in every prompt for one release.
A clear picture of the limits saves credits. These are the five places where the approach stops being the right tool.
- Exact beat sync: reactive motion is approximate, so a kick drum and a visual pulse will often line up in feel but not to the frame. If your release needs tight hits, cut the clips against the waveform in an editor.
- Waveform and spectrum looks: bars, circles and oscilloscope lines driven by real audio levels are not something the toolkit generates. Use a dedicated visualizer app for that style and the toolkit for the artwork behind it.
- Clip length: audio-to-video produces short clips, not a full-length video of a five-minute song. Plan on generating several clips and joining them, and check the model page for its current limits.
- Lyrics and text on screen: models do not render a reliable lyric track, and generated lettering often breaks. Add titles and lyrics in an editor, where the spelling stays under your control.
- A stable look across clips: each generation is a new interpretation, so characters and color shift between runs unless you start every clip from the same image and repeat the same style phrase.
That makes it a good fit for atmosphere, teasers and looping backgrounds, and a poor fit for exact audiograms.
The short-clip format fits the places music actually gets shared. A release teaser is the obvious one: a few seconds of the hook over animated artwork, posted before the song drops. Animated cover art for a single is another, and the same first-frame image you used for the cover works here, which keeps the visual identity consistent. See album and podcast cover art for the still-image side of that job.
Loops are the quiet winner. A slow, abstract clip over a lo-fi beat can sit behind a stream or a study playlist, and the lo-fi beats for streams and study page covers the audio half.
A word on rights. Only upload audio you made, licensed or generated yourself, because a new video does not turn someone else's recording into yours. Keep real people's faces out of the first frame unless the person is you or has agreed; fictional characters and abstract scenes avoid the problem.
Can AI make a music visualizer from my own song?
Yes, within limits. Upload your audio to an audio-to-video model such as lightricks/audio-to-video, add a still image or a written scene, and it generates a short video whose visuals respond to the sound. The result is an artistic interpretation of your track, not a frame-accurate analysis of it. For a release teaser or animated cover art that is usually what you want.
Which model turns audio into video on Picasso IA?
lightricks/audio-to-video is the one built for it. It accepts wav, mp3, flac, ogg and m4a files, an optional first-frame image, a text prompt and a guidance scale. Other video models in the catalog, such as wan-2.7-i2v, can animate an image from a prompt but do not take your audio as an input. Check each model page for its current inputs before you plan a workflow around it.
Will the visuals sync to the beat exactly?
No. The motion reacts to the rhythm and mood of the audio, and a lot of the time that feels convincing, but it is approximate. A pulse of light may arrive a little early, a little late or on a different beat than you had in mind. If you need hits landing on exact frames, generate the clips and then cut them against the track in a video editor.
Can I make a waveform or spectrum bar visualizer here?
Not as a feature. Bars and lines driven by the real audio levels come from dedicated visualizer software, and the toolkit does not generate them. What you can do is create the artwork or the animated background in the toolkit and layer a waveform over it in an editor. That combination often looks better than either piece alone.
What audio formats can I upload?
The audio-to-video model lists wav, mp3, flac, ogg and m4a as supported formats, so there is usually no conversion step. If your track lives in another format, export a copy from your music software in one of those. Trimming to the section you want visualized also helps, because the generated clips are short.
Can I use my album cover as the starting image?
Yes, and it is the best default. The image you upload is used as the first frame, so the clip begins on your artwork and then moves. Pick a cover with a clear subject and some empty space, since a dense collage gives the model little to separate. Only use artwork you made, own or have permission to animate.
Can AI generate the music as well?
Yes. The toolkit has music models, including lyria-3, music-2.6, stable-audio-2.5 and music from elevenlabs, that write a track from a text description. You can feed that output into the audio-to-video model afterwards. It is two separate generations with their own credit costs, but it lets you build a clip with no recording at all. The AI music videos page walks through the longer version.
How long can a visualizer clip be?
Short. Audio-to-video models generate clips measured in seconds, not full songs, and the exact limit belongs to the model and can change, so read the model page instead of trusting a number from an article. For a full track, make several clips from different sections, vary the prompt slightly, and join them in an editor over the original audio.
Can I post the visualizer on Spotify, YouTube or Instagram?
Usually yes, if the audio is yours, licensed or generated by you, and the visuals contain nothing you lack rights to. Each platform has its own rules for video length, formats, music rights and monetization, and those rules change, so check the platform's current requirements before uploading. Lay your master over the clip to keep the original audio quality.
How much does it cost to make an AI music visualizer?
Generations are paid in credits, and the cost depends on the model and the settings you choose, so a precise number here would age badly. Video generation costs more than still images, which is a good reason to test the look with a single image first. New accounts start with free credits, and plans are on the pricing page.
Your track already has a mood, so give it something to look at. Open the Picasso IA toolkit and see what the first clip does with it.