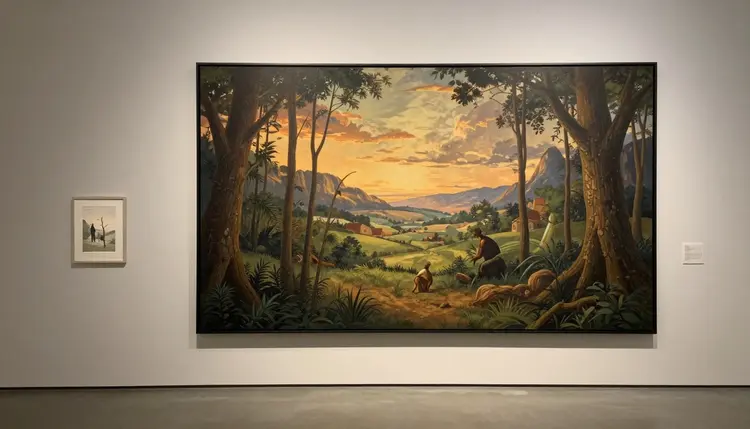
A design that looks razor sharp on a laptop can still get rejected the moment it reaches a print shop, and the reason is rarely the artwork itself. Screens and printers measure sharpness in different units, and a file built for one rarely satisfies the other automatically. Enlarging artwork for print is less about making an image bigger and more about closing that resolution gap before the ink touches paper.
A monitor shows an image at roughly 72 to 150 pixels per inch, and at that density the eye reads gradients and edges as smooth even when the file underneath is fairly small. Print does not get that forgiveness. A press or a decent home printer holds detail close enough to the eye that quality work is usually judged at 300 pixels per inch, and the gap between 150 and 300 is not cosmetic, it roughly quadruples how many pixels the file needs to hold.
That gap explains a pattern almost every illustrator and designer runs into: a file exported at the size needed for a website or an Instagram post looks perfect there and gets flagged the moment it reaches a print-on-demand service or a local shop. Nothing about the artwork changed, only the unit it is judged by.
The mismatch also worsens as the print gets larger. A phone screen and a gallery wall each want their own pixel density, but the wall is also physically bigger, so the pixel count required multiplies by both dimensions and density at once. That is why a poster fails where a postcard from the same file passed.
The number a print shop cares about is not the resolution setting inside an editor, it is the actual pixel dimensions measured against the physical size of the print. Multiply the print's width in inches by the target DPI, then do the same for height, and the result is the minimum pixel width and height the file needs to hold.
An 18 by 24 inch poster at 300 DPI needs roughly 5400 by 7200 pixels, a size most source files, especially anything exported for screens, simply do not reach. A file that is 1500 by 2000 pixels, which looks enormous on a monitor, covers only a fraction of that target, and a print shop's software will flag it before an operator looks at the design.
Pro tip: before enlarging anything, get the printer's exact pixel requirement rather than guessing at a DPI. Multiply your intended print width and height, in inches, by the number they give you, and treat that pair of numbers as the real target for the whole workflow.
This is also why "just resize it bigger" in a basic editor solves nothing. Stretching a 1500 by 2000 pixel file to 5400 by 7200 pixels does not add information, it spreads the existing pixels thinner and the print comes out visibly soft. Reaching the target honestly needs a model that infers plausible new detail, not one that copies and stretches what is already there.
Not every print needs the same target, and knowing which category an order falls into saves time before a pixel gets touched. Viewing distance matters as much as size: a billboard read from a moving car does not need the density of a card held six inches from someone's face.
Small prints such as greeting cards, postcards and product labels are viewed up close, so they hold the strictest standard, typically the full 300 DPI, but because they are physically small the pixel target stays manageable. Standard posters, the 18 by 24 inch or A2 range hung at arm's length, can often work at 150 to 200 DPI without a visible drop, since viewing distance does some of the forgiving resolution would otherwise have to do.
Large canvas prints and fine art reproductions sit in a middle zone: big enough that 300 DPI would demand an enormous file, but detailed enough that dropping much below 150 DPI starts to show. Banners and billboard-scale prints go the other way, since they are read from meters away, a resolution as low as 20 to 50 DPI can look sharp in person even though the same file would look rough as a postcard.
| Print Size | Typical Dimensions | Recommended Resolution | Minimum Pixel Dimensions |
|---|
| Postcard or small print | 4 x 6 in (10 x 15 cm) | 300 DPI | 1200 x 1800 px |
| Standard poster | 18 x 24 in (46 x 61 cm) | 150 to 200 DPI | 2700 x 3600 px |
| Large canvas or fine art print | 24 x 36 in (61 x 91 cm) | 150 DPI | 3600 x 5400 px |
| Banner or billboard | 4 x 8 ft (1.2 x 2.4 m) | 20 to 50 DPI | 960 x 1920 px |
Use the row that matches the order, not the file you already have. A source that clears the postcard row by a wide margin can still fail the poster row completely, since the target roughly quadruples between those two rows alone.
On Picasso IA, upscaling models built for this job read the source and generate the missing detail rather than duplicating pixels, which is why a well-prepared original can jump from web size to poster size, or poster to canvas, and still hold up at viewing distance. With 488 models in the catalog, several are tuned for high-resolution output specifically.
An honest tool page says where the tool stops, not just where it shines. Super-resolution adds plausible detail, it does not recover information that was never captured, and five limits show up often enough to plan around.
- There is a real ceiling: a thumbnail-sized source, under a few hundred pixels wide, has a hard limit on how large it can honestly go, since the model has almost nothing to work from and starts inventing rather than refining.
- Enlargement is not restoration: a blurry or badly compressed source stays blurry in character even after upscaling, since the model sharpens what exists rather than un-blurring what was lost. A separate photo restoration pass handles damage, not size.
- Color can shift independently of size: a file that looks correct on a monitor can still print warmer, cooler or duller than expected, because screens and printers reproduce color differently, and that gap is what a printer's own proofing exists to catch.
- Text and fine linework soften first: logos, small type and thin outlines are the hardest elements for any upscaler to hold perfectly, so artwork built around crisp typography deserves an extra look at full zoom before approval.
- A test print always beats a screen preview: a monitor cannot show what 300 DPI looks like on paper, and the only reliable way to judge an expensive print run is to hold a small physical proof first.
Turning a rejected file into an accepted one is a short, repeatable process, and skipping a step usually causes a second rejection.
- Get the exact target from the printer. Ask for the required pixel dimensions directly, or get the target DPI and print size and calculate the pixel dimensions yourself, since guessing wastes a generation.
- Upscale the file to meet that target. Open the source in the Toolkit and run an upscaling model built for detail generation rather than simple resizing, aiming to meet or slightly exceed the printer's number.
- Check fine detail at full zoom. Look at edges, text and any repeating pattern at 100 percent, since artifacts invisible when the image is shrunk to fit a screen become obvious at full print size.
- Order a small test print first. Before an expensive run, print a section, or the whole piece at reduced size, on the same paper stock the final order will use, since paper and ink shift both color and sharpness.
- Send the final file once the test print looks right. Deliver the upscaled file at the dimensions the printer requested, in the format they asked for, and keep the original in case a second size is needed later.
Why does an image that looks fine on my screen get rejected by a print shop?
Because screens and printers judge sharpness by different standards. A monitor displays at roughly 72 to 150 pixels per inch, while quality print work is usually judged against 300, so a file that looks crisp on a laptop can fall well short of what a print shop's software flags as acceptable. The artwork has not changed, only the unit it is measured against.
How do I figure out how many pixels my file actually needs?
Multiply the print's width in inches by the target DPI the printer gave you, then do the same for height, and the two results are the minimum pixel dimensions the file needs to reach. An 18 by 24 inch poster at 300 DPI needs roughly 5400 by 7200 pixels. If the printer only gives you a DPI figure, this calculation is the fastest way to know whether your file clears the bar before you send anything.
Can I just resize the image bigger in a basic photo editor?
Stretching an image in a basic editor does not add missing detail, it spreads the pixels that already exist across more space, and the result usually looks soft once printed at size. That is the gap a dedicated upscaling model closes: it generates plausible new detail from what the image already contains, rather than copying and stretching what is there. For anything headed to print at real size, a plain resize is rarely enough.
Is there a limit to how much an image can be enlarged?
Yes. Enlargement works by inferring plausible detail from what is already in the file, and a source with very little information to begin with, a small thumbnail or a heavily compressed photo, gives the model little to build on. There is a real ceiling on how far any single source can honestly go, and pushing past it produces artifacts and invented texture rather than genuine sharpness. Starting from the largest, cleanest original available always raises that ceiling.
Does upscaling fix a blurry or out-of-focus photo before printing it large?
Not fully. Upscaling adds resolution, it does not remove blur, so an out-of-focus source stays soft in character even after the pixel count goes up, just at a larger size. A separate restoration pass, built for damage and focus issues rather than size, is the right tool, and running it before enlargement usually gives the upscaler a cleaner file to work from.
What resolution do I actually need for a large canvas print?
Large canvas and fine art prints, generally 24 by 36 inches and up, are often judged acceptable at around 150 DPI rather than the full 300 DPI small prints demand, partly because they tend to be viewed from a greater distance. That still means a substantial target, roughly 3600 by 5400 pixels for a 24 by 36 inch canvas, so confirm the exact figure with the print provider rather than assuming either extreme.
Will the colors in my print match what I see on screen?
Not automatically, and this is a separate issue from resolution. Screens emit light while printers lay down ink, and the two reproduce color differently even when the pixel dimensions are exactly right. That is what a printer's own color proofing process is built to catch, and it is one more reason a small test print matters: it shows the color shift before it shows up on an expensive final run.
Can I enlarge a low-resolution logo or illustration with fine linework?
Often yes, but it deserves extra scrutiny. Thin outlines, small text and crisp geometric shapes are among the hardest elements for any upscaling model to hold perfectly, since a small shift in one line changes how sharp the whole mark reads. After upscaling fine linework, zoom in on the edges and any embedded text specifically, rather than judging from a shrunk preview, before approving it for a print run.
How much bigger can I realistically go from a phone photo of my artwork?
It depends on how the original was captured. A well-lit, in-focus photo taken with a modern phone, held steady and close to the artwork, typically holds enough detail to reach poster size and sometimes canvas size after upscaling. A dim, shaky or heavily cropped phone photo starts from a much smaller effective resolution, so it hits its honest ceiling sooner, no matter how good the model is.
Does Picasso IA support printing directly, or only preparing the file?
Picasso IA prepares the file, it does not print or ship anything. The upscaling models in the Toolkit take a source image and generate a higher-resolution version sized for the print you have in mind, and from there you send the finished file to whichever print shop or press you are working with. Credits cover generation, and pricing is listed on the pricing page.
A file rejected once does not have to get rejected twice. Bring the original into the Toolkit, upscale it to the pixel dimensions your printer asked for, and check it at full zoom before you spend a cent on the run.