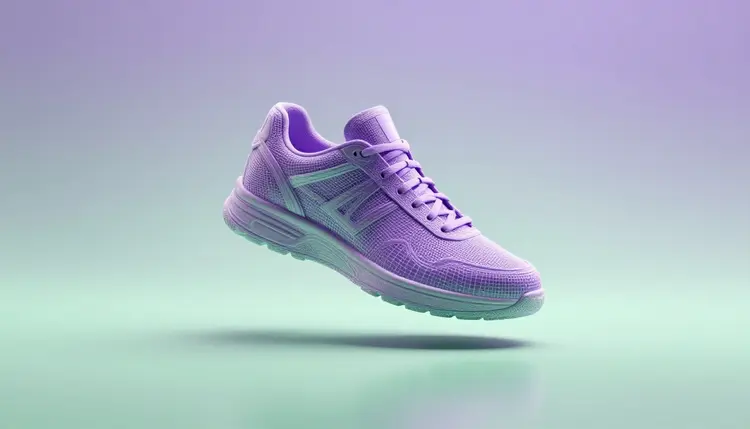
A product that only exists as photos can still end up as a 3D file a shopper spins in the browser. You hand a 3D model one clean shot, or a few angles of the same item, it reconstructs the shape and the surface, and you export a mesh for a web viewer, a catalog or a mockup. It is a strong first pass, not a scan. This page covers how to get that first pass, what to check in it, and where to stop trusting it.
A flat photo shows one angle at one moment. A 3D file lets a shopper turn the product around, a designer drop it into a scene, and a sales team send a link instead of a parcel. That used to mean a scanning rig or a modeler billing by the hour. Image to 3D models shrink the first step to an upload: they read the photo, infer the depth, close the sides the camera could not see and paint a texture over the whole surface.
On Picasso IA this lives in the 3d-models category, which has five models in a catalog of 502. Two matter for products. hunyuan-3d-3.1, published by Tencent, takes one photo or a text description and can return a textured model or a plain geometry-only mesh, with PBR materials and an adjustable face count. rodin, published by hyper3d, takes up to five photos of the same object and exports GLB, FBX, OBJ, USDZ or STL. Both run from the toolkit in the browser, with nothing to install. If you want the single-photo basics without the product angle, the image to 3D model page covers them.
The model reconstructs what it sees and invents what it cannot, so every ambiguity in your photo becomes a guess in your mesh. The rules of product photography mostly apply: one item, a plain background, soft even light, sharp focus, and the whole object inside the frame. The hunyuan-3d-3.1 notes add two more: keep text off the background, and let the product fill more than half of the frame. It accepts JPG, PNG and WebP files, with a side between 128 and 5000 pixels and a size up to 6 MB.
Angle matters more than resolution. A three-quarter view, slightly above the product, shows the front, one side and the top at once, which is the most a single image can say. If you are using rodin, shoot three to five photos around the item at the same distance and with the same light, so the model is not reconciling a sunny front with a shadowed back. Be wary of glass, chrome and mirrors: reflections look like geometry to the model.
No usable photos yet? Generate the clean shot first. A text-to-image model gives you full control of angle, light and background, and the AI product photography page shows how to build that kind of image. One rule follows you through this page: if the model will sit on a product page, the source picture must be a truthful picture of the real item.
Neither model is the better one in general. They differ in what they accept and what they hand back, so the choice follows the product and the pipeline. The table below is a starting point to test against your own items, not a ranking.
| Product | Start with | Settings worth trying | Check first |
|---|
| Mug, bottle, jar | hunyuan-3d-3.1, one three-quarter photo | Normal mode, PBR on | Label text, handle shape |
| Sneaker, handbag | rodin, three to five angles | Quad mesh, medium quality | Stitching, straps, the sole underneath |
| Furniture, lamp | rodin, several angles | GLB export, bounding box set to the real size | Thin legs, proportions |
| Jewelry, small metal parts | Either, expect a rough draft | Geometry mode as a base for texturing by hand | Chain links, facets, reflections |
| Packaging box | hunyuan-3d-3.1, flat-lit photo | Lower face count for a web viewer | Printed artwork on the hidden faces |
The practical split: hunyuan-3d-3.1 is the quick route from a single photo, and its face count setting lets you choose between a lightweight mesh and a dense one. rodin is the one to reach for when you have several photos of the same item, want a specific export format, or need to pin the model to real dimensions. You can run both on the same product and keep the one whose invented sides are closer to the truth. The rest of the full catalog is a click away.
The loop is short on purpose. Generation takes minutes, so the real work is in the input and in judging the output.
- Prepare two or three clean photos. One product, plain background, even light, three-quarter angle for the main shot, plus a side and a back view if you will use rodin.
- Open the toolkit and pick a 3D model. In the toolkit, choose hunyuan-3d-3.1 for a single photo or rodin for several, both listed under the 3d-models category, and upload your images.
- Set mode, materials and detail. On hunyuan-3d-3.1 pick Normal for color or Geometry for a white mesh, turn PBR on, and lower the face count for the web. On rodin choose a quality tier, a mesh mode and GLB as the format.
- Generate and orbit the result. Turn the model all the way around and compare it with the real product, side by side, especially the back and the underside.
- Download and test it in your own viewer. Open the file in the viewer your site uses, or in Blender, and check the load time, the scale and the colors before it goes anywhere public.
A word on web-ready, since the title promises it. GLB is the format most web viewers read, and a lower face count keeps the file light. Picasso IA generates and exports the file; it does not host the viewer on your store, so the test in step 5 is yours to run, on your own page, on a mid-range phone and not only on your desktop.
Three things go wrong quietly, and none of them shows up in a thumbnail.
A 3D product model is a claim about the item, not decoration. If the back, the underside or the color is a guess, a shopper who spins it is looking at your guess, so check every side against the real product before publishing.
Scale first. A generated mesh has no built-in real-world units, so a mug can arrive the size of a house. rodin lets you set a bounding box with width, height and length, which helps; on any model, measure the real product and set the size in your own tool before the file goes into a viewer or an augmented reality view.
Materials next. PBR textures respond to light more convincingly than a flat baked color, but the model still invents the finish. Matte can come back glossy, brushed metal can look like plastic, and a brand color can drift a few shades. Hold the product next to the screen and compare, then fix the color in your editor.
Then the hidden sides. From one photo, everything behind the product is a statistical guess. A shoe may get a generic heel, a box a blank back. If a feature matters to the buyer, such as a zipper, a port or a sticker, it must appear in a photo you feed the model, or you fix it by hand. The Amazon listing photos page covers the truthfulness side of marketplace images, and the platform you sell on has its own requirements for 3D and AR content, so check its current rules before uploading.
The workflow is built for drafts, catalogs and early reviews. It is the wrong tool in a few specific places:
- Exact dimensions: the shape is plausible, not measured, so anything that has to fit something else, a case, a lid or a mount, needs a real measurement or a scan.
- Thin and transparent parts: straps, chains, wire frames, glass and clear plastic tend to fuse, thicken or vanish during reconstruction.
- Text and logos: printed lettering often comes back soft or warped on the surface, so a label that matters has to be fixed in the texture by hand.
- Clean topology: the mesh is built for looking at, not for animating or deforming, and rigging it means retopology first.
- Mechanical products: hinges, buttons and moving parts are rendered as shapes, so a model of a device shows its look and not how it works.
None of this argues against the tool. It argues for pointing it at jobs where a fast, spinnable draft beats waiting for a full 3D production, and for sending the rest to a human modeler. If the end goal is a physical copy instead of a web view, the 3D models for 3D printing page covers the repair work that comes after generation.
Can product photos really become a 3D model?
Yes, with a clear definition of model. The AI reconstructs the geometry your photo shows, invents a plausible version of what it hides, and paints a texture over the whole thing. You get a complete, orbitable file in minutes. It is good enough for a web viewer draft, a catalog mockup or a design review, and not good enough, without checking, to stand in for a measured scan of the item.
Which Picasso IA models turn photos into 3D?
The 3d-models category holds five models, and two are built for products: hunyuan-3d-3.1 from Tencent, which takes one photo or a text description, and rodin from hyper3d, which takes up to five photos. The other three in the category handle 3D characters and motion. All of them run from the toolkit in the browser, so no local GPU or 3D software is needed.
What file formats can I export?
It depends on the model. rodin lists GLB, FBX, OBJ, USDZ and STL as export options, and GLB is the usual choice for web viewers. hunyuan-3d-3.1 returns a file that standard 3D software and real-time engines open, and the catalog does not list its format choices, so open your first result and check what you got before you build a pipeline around it.
Can I use one photo, or do I need several?
One is enough to start. hunyuan-3d-3.1 works from a single image, and a clean three-quarter shot gives it the most information. rodin accepts up to five, which helps with products whose sides differ a lot, like shoes, bags and furniture. More angles reduce the guessing about hidden sides, but they only help if the light and distance stay consistent between shots.
How do I keep the file small enough for a web page?
Lower the detail before you export. hunyuan-3d-3.1 has a face count setting, so choose a lightweight mesh for the browser instead of the dense default, and rodin has quality tiers down to extra-low. Then test the real load time on your own page and on a phone. The right balance depends on your viewer and your audience, so no single number applies to everyone.
Will the colors and materials match the real product?
Close, not exact. PBR materials make surfaces react to light more naturally, but the model infers the finish: matte can look glossy, and a brand color can drift. Compare the model against the physical item under the same light, correct what is off in your editor, and never rely on the generated color for something a customer will use to decide, such as a dye or a fabric shade.
How do I get the size right?
Set it yourself. Generated meshes carry no real-world units, so measure the physical product and scale the model in your viewer or in Blender. rodin also accepts a bounding box with width, height and length, which gives the output the right proportions from the start. Even then, check one measurement against the real item, because a plausible shape is not a measured one.
Is it honest to show an AI model of my product?
It is as long as the model matches the item. The rule is the same as for any product picture: do not show features the product lacks, do not hide the ones it has, and do not let an invented back side pass as the real one. Check each side against the product.
Can I use these models in an online store?
Often yes, once you have checked two things. First, the rights to the input: photograph or generate only products you own or have permission to show. Second, the platform: marketplaces and store builders each publish their own requirements for 3D and AR files, so read the current rules before you upload. Have a person review the model before it goes public, the same as with any generated asset.
How much does a generation cost?
Each generation costs credits, and the amount depends on the model and the settings you choose, so heavier modes cost more than light ones. New accounts get free credits, which is enough to try your own product before committing to anything. Current plans are on the pricing page, and if a job fails or a file comes back broken, support is the direct route to a person.
Pick your cleanest product photo and the free credits a new account starts with, then open the Picasso IA toolkit and see what the item looks like from the other side.