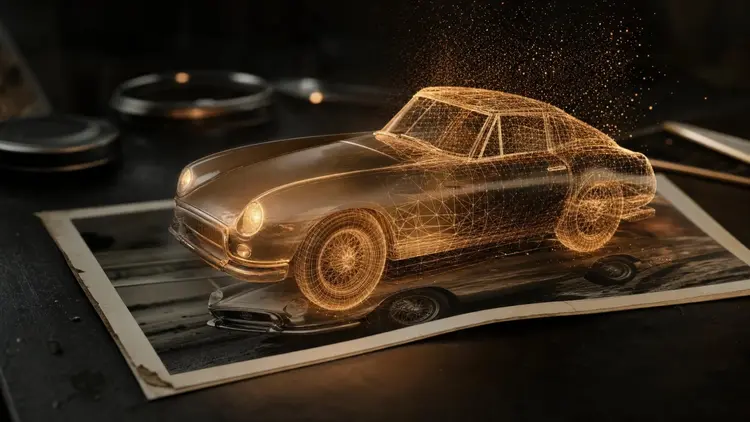
A single photo of a sneaker, a figurine or a concept sketch can come back as a rotating, textured 3D mesh a few minutes after you upload it. That mesh is not a finished production asset, and this page will not pretend it is. What it is: a fast, genuinely useful starting point for previsualization, game props, product mockups and 3D printing drafts. Here is what image to 3D generation on Picasso IA really produces, and where your own tools still take over.
Image to 3D generation takes one picture and reconstructs a complete object from it: the geometry the camera saw, plus a plausible guess at everything it did not. The model infers depth, closes the back, and paints a texture across the whole surface. The result is a textured mesh you can orbit, light and export, produced in minutes instead of the hours a manual model would cost.
On Picasso IA this happens in the 3d-models category of the 488 model catalog. Two of its five models are built for exactly this job: hunyuan-3d-3.1, published by Tencent, and rodin, published by hyper3d. Both accept a single image and return a mesh with color already applied, and both produce output that current versions of Blender import directly.
Set expectations before the first run. What comes back is dense, auto-triangulated geometry with an automatically generated texture. For a blockout scene, a background prop, a design a stakeholder can spin around, or the first draft of a 3D print, that is honestly enough. For a rigged character or a product render a client will scrutinize at full screen, it is the starting point that saves you the first day of work, not the last one.
The biggest lever you control is the input. These models reconstruct what they can see and invent what they cannot, so every ambiguity in your photo becomes a guess in your mesh, and the guesses are where meshes go wrong.
Concretely: one subject per image, not a scene. A plain, contrasting background, because busy backgrounds leak into the silhouette. Even, diffuse light, since hard shadows get read as geometry and baked into the texture. The whole object inside the frame; anything cropped gets invented. Sharp focus on the object, which matters more than raw resolution. And be suspicious of glass, mirrors and chrome: reflections and transparency confuse the reconstruction more than any other property.
You do not need a photograph at all. Some of the best inputs are generated: render your concept with one of the 203 text-to-image models in the catalog, then feed that render to the 3D generator. A generated image gives you full control over angle, lighting and background, which is exactly the control a quick phone photo lacks. If the object is a character you need to keep recognizable, the consistent AI characters workflow pairs naturally with this one.
Pro tip: shoot or generate the object in a three-quarter view, roughly 45 degrees off center and slightly above. That single angle exposes two sides and the top at once, which is the most information one image can hand the reconstruction.
The loop below is short on purpose. The generation itself takes minutes, the craft is in choosing the input and judging the output, so plan to run it more than once and keep the best interpretation.
- Pick or create a clean source image. One subject, plain background, even light, three-quarter angle. Generate the image first if the object only exists in your head.
- Open the Toolkit and choose a 3D model. In the Toolkit, select hunyuan-3d-3.1 or rodin from the 3d-models category and upload your image.
- Generate and orbit the result. Inspect the mesh from every side, especially the parts the camera never saw: the back, the underside, deep recesses.
- Iterate on the weak side. If the back came out wrong, rerun with a different angle of the same object, or clean up the input, and compare interpretations.
- Export and finish in your own tools. Take the best mesh into Blender, your engine or your slicer for retopology, repair, scaling or texturing, depending on the job.
The same mesh can be a finished asset for one purpose and a rough draft for another. This table is the honest version of where the output lands for the common destinations, and the third column is the part most tutorials skip.
| Destination | What the generated mesh delivers | What you still do |
|---|
| Previsualization | Correct volumes and a readable texture, ready to place | Almost nothing, arrange and light the scene |
| Background game prop | Recognizable shape with baked color | Decimate, check the silhouette, drop it in |
| Hero game asset | A reference and a starting sculpt | Retopology, UVs, PBR textures, LODs |
| 3D printing | Complete looking geometry for the object | Mesh repair, wall thickness check, scaling |
| Product mockup | A rotatable draft of the design | Fix proportions, refine or re-render |
Read that third column before generating, not after. Knowing a hero asset still needs retopology changes which objects are worth generating at all: the forty background props, not the one protagonist your players stare at for thirty hours.
Every limit in this list is predictable, which makes it plannable. Budget for the cleanup your destination actually requires and none of these will surprise you mid-project.
- Topology: the mesh is auto-generated triangles, not the clean quad loops that animation and subdivision need. Rigging or deforming it means retopology first.
- Hidden surfaces: everything the camera did not see is a statistical guess. Backs, undersides and interiors can come back generic or simply wrong.
- Fine structures: thin rods, lattices, hair, cloth edges and small holes tend to fuse, thicken or vanish during reconstruction.
- Textures: color comes back baked with the lighting of the source image, so shadows live in the texture and proper PBR materials are on you.
- Scale: the mesh carries no real-world units. Before printing or engine import, you set physical dimensions yourself, every time.
None of this argues against the workflow. It argues for pointing it at jobs where a fast draft wins, which turns out to be most of them.
For 3D artists, the immediate win is previz and kitbashing. Generate rough versions of every object in a scene in an afternoon, block the composition, then hand-model only the assets the camera ends up close to. The generated meshes also work as honest reference: orbiting a flawed guess at an object still teaches you more about its volumes than a flat photo can.
For indie game developers, the sweet spot is set dressing at scale. A market scene needs forty props nobody inspects; generating and decimating them costs a fraction of modeling them, and the schedule survives. Keep hero assets in your normal pipeline, and treat every generated prop to a silhouette check at gameplay distance before it ships.
For product designers, image to 3D turns a sketch or one product shot into something a stakeholder can rotate. That changes early meetings: a spinning draft answers questions a slide never will, and rerunning the loop after feedback costs minutes, not a modeling day.
For 3D printing hobbyists, this is the missing front end of the hobby. Photograph a figurine concept or a discontinued knob, generate, repair, scale and print a fit-test draft the same evening. Every generation costs credits that vary by model, current plans are on the pricing page, and if a mesh comes back corrupted or a job fails, support is the direct route to a human.
Can one photo really become a usable 3D model?
Yes, with the word usable defined honestly. The generator reconstructs the geometry the photo shows and invents a plausible version of everything it hides, so you get a complete, textured, orbitable mesh in minutes. That mesh is genuinely usable for previsualization, background props, mockups and print drafts. It is not usable, without cleanup, as a rigged character, a hero game asset or a production product render. The realistic promise is a strong starting point, not a finished deliverable.
Which models on Picasso IA turn an image into 3D?
The catalog has a dedicated 3d-models category with five entries. The two built for this specific job are hunyuan-3d-3.1, published by Tencent, and rodin, published by hyper3d; both accept a single image and return a textured mesh. The other models in the category cover 3D character and motion generation. Everything runs in the browser through the Toolkit, with no local GPU and nothing to install.
What kind of image gives the best result?
One subject, fully in frame, on a plain background, in even diffuse light, captured or generated from a three-quarter angle. Sharp focus matters more than resolution. Avoid transparency, mirrors, strong shadows and anything overlapping the subject, because the reconstruction reads all of it as geometry. A slightly boring, catalog-style shot of the object beats a dramatic beauty shot every single time.
Can I 3D print the generated mesh straight away?
Plan on a repair pass first. Generated meshes are not guaranteed watertight, carry no real-world scale, and can contain walls too thin to survive slicing. Run the file through the repair tools in your slicer or in Blender, set physical dimensions yourself, check minimum wall thickness against your printer and material, and then slice. For decorative drafts and fit tests this pass takes minutes; treat anything structural with far more suspicion.
Is the output ready to drop into a game engine?
As a distant background prop, often yes after polygon reduction. As anything the player inspects closely, no. The mesh is dense auto-generated triangles without clean edge loops, the UV layout is automatic, and the texture has lighting baked in, so it fights your engine lighting. The usual indie pattern is decimate for far props, retopologize and re-texture for anything closer. That is still much faster than modeling from nothing.
How do I control what the back of the object looks like?
From a single image, you mostly do not; the model invents the unseen side based on what similar objects tend to look like. The practical workaround is iteration. Generate from two or three different angles of the same object and keep the mesh whose invented side is closest, or recompose your input so the features you care about face the camera. For symmetric objects the guess is usually fine; for objects with distinct front and back detail, expect to choose which side matters.
How much does a generation cost?
Each generation costs credits, and the amount depends on the model and the settings you pick, since heavier models cost more to run. New users receive free credits at signup, which is enough to try image to 3D on your own photos before committing to anything. Current plans and their credit allowances are listed on the pricing page, and they change over time, which is why this page does not quote numbers.
Can I use the generated models commercially?
Check two things before shipping anything. First, the rights to your input: a photo of your own product is a very different starting point from a picture of someone else's design, and the generator does not change who owns what the image depicts. Second, the platform terms for the license your plan attaches to outputs. As with every AI-generated asset, give anything commercial a human review before it goes out the door.
What file do I get and what opens it?
You download a mesh in a standard 3D format; the exact format depends on the model you run. Current versions of Blender import the output directly, and the common pipeline is Picasso IA for generation, then Blender, your engine or your slicer for everything after. If some target tool insists on a different format, one pass through Blender converts it, and nothing about the mesh is proprietary or locked.
Does the mesh come with textures and materials?
The image to 3D models return meshes with color textures already applied, which is what makes the result readable the moment it loads. What you should not expect is a tuned production material setup: plan on a baked color texture rather than a full PBR set, with the lighting of the source image burned in. For previz and printing that is irrelevant. For rendering and games, rebuild materials using the generated color as your base.
A spare photo and the free credits a new account starts with are all it takes to test this on your own object. Open the Toolkit, pick one of the 3D models and see what your picture becomes.