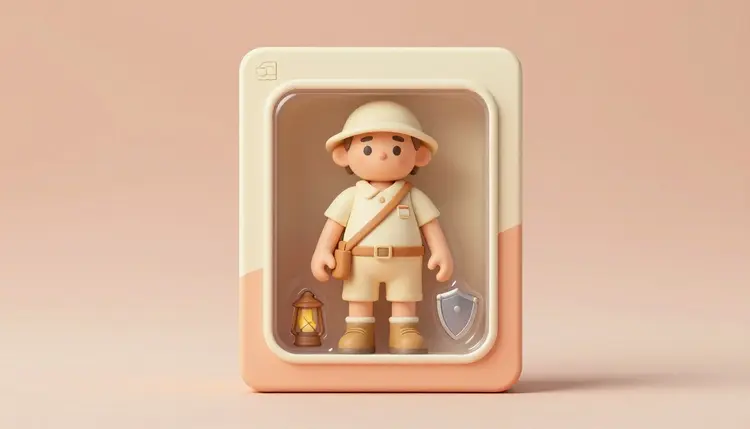
Somewhere on your feed right now, a friend's face is looking out from a plastic window box, complete with a tiny stand, a printed logo and a couple of accessory blisters, styled exactly like a shelf toy from a toy aisle. That is the action figure trend, and it runs on one repeated idea: keep the face real, invent the box, the sculpt and the packaging copy around it. An AI image editor can do that from a single selfie in under a minute.
The format spread because it is instantly readable. A friend, a coworker, a pet owner's dog, rendered as a boxed collectible with a header card naming their signature move or their coffee order, reads as a joke in half a second and gets shared for the same reason a good meme template does: anyone can drop their own face into it. What makes it possible technically is a specific kind of model, one built to edit a real photo rather than generate a stranger from a text description.
Picasso IA runs 488 models behind one interface, including several built exactly for this: preserving a face while restyling everything around it. The full catalog is browsable if you want to see what else is in there, and new accounts start with free credits, enough to try a first box style before spending anything.
A plain text-to-image model asked for "an action figure of a man" invents a generic face, because it never saw yours. The trend depends on image editing models instead, the kind that take a reference photo as an anchor and treat the prompt as an instruction for what to build around it, not what to invent from nothing.
Google's nano-banana-2 accepts up to 14 reference images and follows conversational edits well, so it holds a likeness through several rounds of "now add a cape" or "make the box blue" without drifting into a different face. Seedream 4.5 from ByteDance renders at up to 4K and handles multiple references at once, useful when the box art or the accessories come from a separate reference image. FLUX Kontext Pro from Black Forest Labs is built for surgical text-based edits, which suits requests like changing only the header card text or the blister color while leaving the figure alone. Qwen Image Edit Plus composites elements from more than one photo into a single scene, which matters if the pose reference and the face reference are two different images. None of these require training anything; upload, prompt, generate.
The packaging vocabulary does more work in this prompt than almost anything else. "Action figure" alone gets you a plastic-looking person; naming the specific box format is what turns the output into something a collector's shelf would recognize.
| Style | Prompt words that build it | Best for |
|---|
| Blister pack | thermoformed clear plastic blister, cardboard backer card, hanging tab | A classic solo hero shot, the format most people mean by "action figure" |
| Window box | printed window box, foil logo, character artwork on the side panel | A premium collectible look, good for a full-body pose with props |
| Vinyl desk toy | chibi proportions, vinyl figure, small square box | A cute, exaggerated take rather than a realistic sculpt |
| Diorama base | posed on a round display base, museum-style acrylic case, no packaging | Showing the "figure" already unboxed and displayed |
| Blind box mini | small pastel box, mystery figure line, minimalist illustrated art | A collectible-line aesthetic instead of one hero box |
Two habits keep the packaging itself readable. First, ask explicitly for a plain studio background behind the box, the way real product photography is lit, so the model does not fight itself trying to render a busy scene and crisp label text at once. Second, generate three or four variants per prompt; header card text and small accessories are exactly the details that vary most between runs, and a short batch is the fastest way to land on one that reads cleanly.
This walkthrough runs inside the Picasso IA toolkit and takes about ten minutes end to end, starting from nothing but a photo.
- Choose a clean reference photo. A forward-facing shot with even lighting and an uncluttered background gives the editing model the clearest face to preserve; a shot where half the face is in shadow gets copied into the toy version too.
- Write the box and accessory list. Name the packaging style, then list two or three accessories as if writing real toy copy: a tiny mug, a mini laptop, a name plate. Specific nouns render more reliably than vague ones.
- Generate with an identity-preserving editor. Run the prompt through nano-banana-2 or Seedream 4.5 with the photo attached as the reference image, and generate a small batch rather than a single result.
- Refine one detail at a time. Feed the best result back into FLUX Kontext Pro or Qwen Image Edit Plus and change a single thing per pass, the header text, the blister color, an accessory that came out wrong.
- Upscale and export. Run the winning version through an upscaling model if the printed text looks soft, then download the full-resolution file for posting or printing.
A few habits separate a convincing box shot from an obviously AI-generated blur, and most of them are about the prompt rather than the model.
- Busy backgrounds: a cluttered scene behind the box competes with the plastic window and the label text, so both come out muddier than they need to; ask for a plain or gently gradient backdrop instead.
- Vague accessory lists: "some accessories" renders as an unreadable blob; naming two or three specific objects gives the model something concrete to draw.
- More than one face per generation: group photos confuse which face the model should anchor on, so run one person per box and combine the results afterward if you need a set.
- Skipping the reference photo: typing a text description of yourself instead of uploading a photo produces a generic stranger, not you; the reference image is the entire point of this workflow.
- Requesting a real toy brand's logo or trademark: asking for a named franchise's packaging design invites a garbled or refused result and is not something to publish anyway; describe a generic collectible box instead.
Pro tip: crop the reference photo to shoulders-and-up before uploading it. A tight crop keeps the model's attention on the face, which is the part of the image the whole trend depends on getting right, instead of spending its effort matching an outfit or background that the box format is going to cover up regardless.
This is not a flawless novelty, and it is worth knowing where it slips before you build a whole set of them.
Printed text is the most consistent weak point. Header card names, tagline copy and any small label on the box tend to come out with a letter wrong or a word slightly malformed, so proofread anything you plan to post rather than trusting it at a glance. Hands and small accessories held at odd angles are the second common failure, a common weakness across current image models generally, not specific to this trend; a figure holding a tiny prop sometimes renders the prop fused strangely into the hand. Side and three-quarter angles hold the likeness less reliably than a straight-on face, since the model has less of the original photo to anchor against. And this workflow produces a flat image, not a physical object or a 3D file; if what you actually want is something to 3D print, image to 3D conversion is the separate workflow built for that. None of this makes the format not worth trying. It means treating the first result as a draft and generating a small batch rather than expecting one perfect image on the first attempt.
Is there a free way to make an AI action figure photo?
Picasso IA gives new accounts free credits, and a single edited image costs less than video or 3D generation, so it is enough to test a box style or two before spending anything. Paid plans are listed on the pricing page, and since they change over time, that page is the only place worth trusting for current numbers rather than anything quoted here.
Which model is best for the action figure trend?
There is no single best, which is the argument for trying more than one. nano-banana-2 handles conversational follow-up edits well and holds a face across several rounds of changes, Seedream 4.5 renders at higher resolution and takes multiple reference images at once, and FLUX Kontext Pro is strongest for precise single-detail edits like fixing header text. A reasonable session runs the same reference photo and prompt through two of these and keeps whichever result reads most cleanly.
Will it actually look like me, or a generic toy face?
With a clear, well-lit reference photo uploaded as the image input, current editing models hold a likeness convincingly for a straight-on pose. It is not pixel-perfect: fine details like specific jewelry or an exact hairstyle sometimes shift slightly, and side angles hold identity less reliably than a forward-facing shot. Uploading the photo, rather than describing yourself in text, is what makes the difference between "looks like you" and "looks like a stranger."
Can I do this with a photo of my pet instead of a person?
Yes, and it works the same way: upload a clear photo of the animal and describe the box and accessories around it. The identity-preserving mechanism that keeps a human face intact works the same way for a dog's or cat's face, since the model is anchoring on the reference image rather than generating an animal from scratch.
Do I need design or Photoshop skills to make one?
No. The entire workflow is a photo upload and a written description; the model builds the plastic window, the cardboard backer and the printed text itself. If a specific detail comes out wrong, the fix is a follow-up text instruction to an editing model like FLUX Kontext Pro, not a manual retouch.
Can I make a whole series with the same packaging style?
Yes. Save the prompt that produced the box style you liked, keep the wording for the packaging fixed, and swap only the reference photo and the accessory list between generations. Because the packaging instructions stay identical, the results read as one consistent product line rather than several unrelated images, the same technique used to keep a character's look consistent across a set of images.
Why do the small accessories sometimes look wrong?
Small objects held in a hand, especially at an angle, are a known weak spot for current image models in general, not something specific to this workflow. Naming the accessory specifically in the prompt, rather than leaving it vague, reduces how often this happens, and running a small batch instead of accepting the first result usually turns up at least one clean version.
Can I turn the image into an actual printed 3D figure?
Not directly from this workflow; a generated action figure photo is a flat image, not a 3D model. If a physical object is the actual goal, a separate image-to-3D conversion workflow exists for turning a still image into a printable mesh, though that route is a different process from the packaging-photo trend covered here.
How is this different from a general AI photo filter?
A generic filter applies one fixed look to a whole photo. This trend depends specifically on an editing model that treats your uploaded photo as a reference to preserve, then builds new content, the box, the accessories, the packaging text, around what it kept. That is closer to how Picasso IA compares against Nano Banana as a standalone tool than to a filter, since the underlying mechanism is instruction-based editing rather than a fixed style transform.
How much does making one of these images cost?
Cost is paid in credits and varies by which model and settings you choose, so a specific number written here would be wrong within a few months. A single edited image sits at the cheaper end of what the catalog offers compared to video or 3D generation, and new accounts start with free credits to test it. Current plan pricing lives on the pricing page, which stays accurate in a way a number in this article cannot.
Your face is already the interesting part. Open the Picasso IA toolkit, upload a clear photo, and see what shows up in the box.