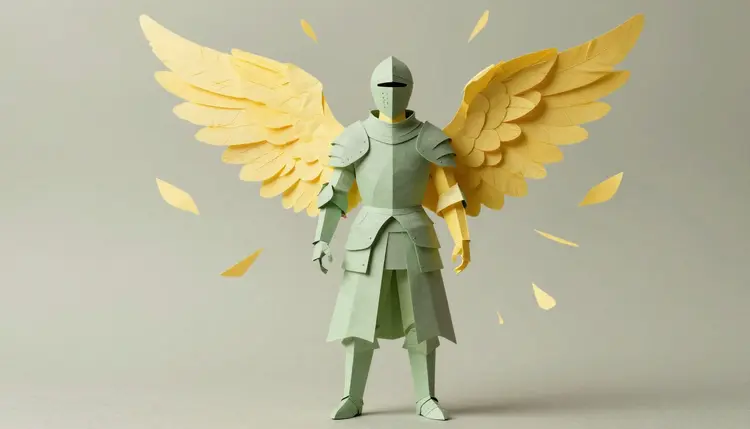
Every transformation video is the same trick: a normal frame at the start, a changed frame at the end, and a few seconds of motion that sells the jump. Armor snaps onto a shoulder piece by piece, wings unfold from behind a back, a character spins through a flash of light and lands in a battle costume. Video models that accept a first and a last frame can now animate the middle, so your job shrinks to building the two ends well.
Transformations used to be expensive in a very specific way. You needed a costume, a locked camera, a green screen, and an editor who could hide the cut. The classic stage and screen versions rely on one hidden moment, the instant the change happens, and that moment is exactly where hand-made effects take the most time.
Image-to-video models are well suited to it because the hardest part is already solved by the input. If you give a model the opening frame and the closing frame, it does not have to invent who the person is or what the final look is. It only has to invent the motion that connects them: light, fabric, feathers and plates moving into place. That is a much narrower job than writing a whole scene from text, and it is why the results hold together better than most people expect.
The format also travels well. A transformation is a complete story in a few seconds, with a beginning, a change and a payoff, which is why it fits short vertical video, cosplay reels and fan edits. You can put your own face in it, but only your own: use a photo of yourself, or a fictional character you drew or generated, never a photo of another real person.
Before you open any model, decide what the last frame looks like, because everything else is built backwards from it. The three looks in the title behave differently, and so do the extras people usually ask about next.
| Transformation | What the last frame needs | What to watch for |
|---|
| Armor-up | Same pose and framing as the start, but in full plate or sci-fi armor | Armor that changes shape between frames; keep the silhouette close to the original |
| Angel wings | Same person, wings spread behind the shoulders, soft light | Wings crossing the face or merging with hair at the shoulder line |
| Anime henshin | An anime-styled version of the same pose, with costume and a light burst | The style jump is large, so the middle can look like a cross-fade |
| Costume reveal | The same person in a cosplay or fantasy outfit | Faces drifting when the outfit is very different from the start |
| Fantasy creature | Horns, fur, scales or a mask added to the same pose | Anatomy getting stranger the more the body changes |
Two rules apply to all of them. First, keep the camera, pose and crop identical in both frames, because the model animates the difference and every unintended difference becomes motion you did not ask for. Second, keep the background simple. A plain wall or a soft blur gives the model less to rearrange, and the transformation stays the focus.
This is the shortest route from a selfie to a finished clip. It uses the toolkit for every stage, so there is nothing to move between apps.
- Shoot a clean start frame. Use a photo of yourself, front-facing or three-quarter, with even light and room around the body for wings or armor. Do not use anyone else's photo.
- Build the end frame with an image editor. Open nano banana or qwen-image-edit-plus, upload the start frame, and describe the finished look in one sentence while asking it to keep the pose, face and framing the same.
- Check both frames side by side. The face, the camera angle and the background should match. Regenerate the end frame until the only difference is the transformation itself.
- Run a first and last frame video model. Upload the start frame as the first frame and the end frame as the last frame in Kling v3 Video, Veo 3.1, Seedance 2.0 or Pixverse v6, then describe the motion that connects them.
- Review, adjust the prompt, rerun. Watch the middle of the clip, not the ends. Change one thing in the prompt, such as the light or the order of the change, and generate again.
Credits are spent per generation, and the cost depends on the model and the settings you pick, so the pricing page is the place to check. New accounts get free credits, which is enough to find out whether the idea works before you commit to a longer clip.
The two frames carry the identity. The prompt has one job, which is to describe how the change happens. Name the order of events, the light and the camera, and keep it to a few sentences. Something like this works as a pattern: the knight stands still, golden light runs up from the boots, armor plates lock onto the chest and shoulders one after another, and a helmet closes last while the camera holds steady.
Describe the motion between the frames, not the final look. The end frame already shows the armor or the wings, so spend the prompt on how they arrive: what moves first, where the light comes from, and whether the camera stays still.
For wings, ask for the feathers to unfold outward and settle, and say whether the body moves or stays still. For a henshin, spell out the beats people recognize: a spin or a raised hand, a burst of light that briefly covers the frame, the outfit replacing the old one inside the glow, and a final pose. A burst of light is genuinely useful here. It hides the hardest moment of the morph behind a bright flash, much as a stage effect would.
If you want the anime version, you can start from the real photo and restyle the end frame with qwen-image-edit-plus-lora-photo-to-anime, then use it as the last frame. For a longer finished piece, our page on turning videos into anime covers restyling a whole clip instead.
Most failed transformation clips come from the same handful of problems, and nearly all of them start before the video model runs.
The first is mismatched frames. If the end frame is cropped differently, the person leans, or the camera angle shifts, the model has to fake a camera move as well as the transformation, and the middle of the clip turns into a smear. Fix the frames, not the prompt.
The second is asking for too much at once. Armor, wings, a new hairstyle and a new background in one jump gives the model four things to invent, and it will often blur them together. Choose one transformation per clip, and chain clips if you want a sequence.
The third is a long prompt with several actions. Video models do best with one clear event. If the clip needs a spin, then a glow, then a pose, say it in that order and keep every sentence short.
The fourth is reaching for a stranger's photo. Do not run a transformation on a photo of a real person who has not agreed to it. Keep it to yourself, or to fictional characters. The same care applies to a friend: ask first, and do not publish it if they say no.
This format has real limits, and knowing them saves credits.
- Identity drift: the face in the middle of the clip can shift slightly, especially when the outfit change is large, so always check the face on the frames that fall between your two images.
- Armor and wing detail: plates, buckles and feather edges can melt or reshuffle while they move, and they rarely animate the way a real mechanism would.
- Clip length: one generation gives you a short clip, so a long scripted sequence has to be stitched together from several runs with matching frames.
- Frame support differs by model: not every video model takes both a first and a last frame, and some reference-image modes switch the last frame off, so read each model's inputs in the toolkit before you plan around it.
- Big style jumps: going from a photo to a flat anime look in one clip often reads as a dissolve rather than a transformation, unless a flash of light covers the change.
None of these should stop you from trying. They are the reasons to keep the first test small, one transformation, one pose, one background.
Can I make a transformation video from just one photo?
Yes, with one extra step. A single photo is your first frame. For the last frame you edit that photo with an image editing model such as nano banana or qwen-image-edit-plus, asking it to add the armor, the wings or the costume while keeping the pose and face the same. Then both images go into a video model that accepts a first and a last frame, and it animates the change between them.
Which video models accept a first frame and a last frame?
In the Picasso IA catalog, Kling v3 Video, Veo 3.1, Seedance 2.0 and Pixverse v6 all list a first-frame and last-frame input. The catalog has 502 models and 121 of them are in the text-to-video category, so other models may also accept both frames. Open a model in the toolkit and read its inputs before you plan around it, because options differ from model to model.
Does it work with my own face?
It can, and it is the use this page is written for. Use a photo of yourself, taken with even light. Faces can drift slightly during the middle of the clip, so check the in-between frames and rerun if the face stops looking like you. Do not use photos of other real people, and do not make transformation clips of someone who has not agreed to it.
Can I turn a fictional character into the one who transforms?
Yes, and it is often easier. A character you drew or generated has no real likeness to protect, and you can generate both the start and end frames in the same style so they match closely. Generate the first image, then ask an editing model for the transformed version, keeping the pose identical. That also avoids the face drift that photos of real faces can show.
How do I get an anime henshin look?
Restyle the last frame, not the whole clip. Take your photo, run it through an anime editing model such as qwen-image-edit-plus-lora-photo-to-anime, and use the result as the final frame, then prompt for a spin, a burst of light and a final pose. The light burst matters because it covers the largest visual jump. For a whole clip in anime style, see the page on turning videos into anime.
Are there one-click transformation presets?
The effects page holds one-click preset effects, so you can try a ready-made look without building frames or writing a prompt. The list changes over time, so browse it to see which ones are there when you visit. Presets are quick and predictable. The manual first and last frame route takes longer, but you choose the exact armor, wings or costume.
How long can a transformation clip be?
It depends on the model. Each generation produces a short clip, and the maximum duration is set by the model you choose, so check the duration options on the model's page. A transformation reads clearly in a few seconds. If you need a longer piece, make several clips and use the last frame of one as the first frame of the next.
Why does the middle of my clip look blurry or messy?
Almost always the two frames do not match well enough. A different crop, a changed pose or a shifted camera angle forces the model to invent a camera move as well, and the in-between turns to mush. Keep both frames identical except for the transformation, simplify the background, and reduce the prompt to a single event. If it still smears, try another model.
Can I post transformation videos on social platforms?
Usually yes, if the footage uses your own photo or a fictional character. Platforms update their rules about AI-generated content and labels often, so check the current requirements of the platform you post on, including any disclosure setting. Do not use a transformation on someone else's likeness, and avoid costumes that copy a protected character too closely if you plan to sell or promote anything with it.
How much does it cost to generate a transformation video?
Generation uses credits, and the cost depends on the video model, the resolution, the duration and the other settings you pick, so the same idea can cost more or less on different models. Image edits for the end frame cost less than video generations. New accounts start with free credits, and the pricing page lists the current plans, which is the only place worth trusting for numbers.
Pick one pose, one transformation and one background, then open the Picasso IA toolkit and build the two frames that your first clip will connect.