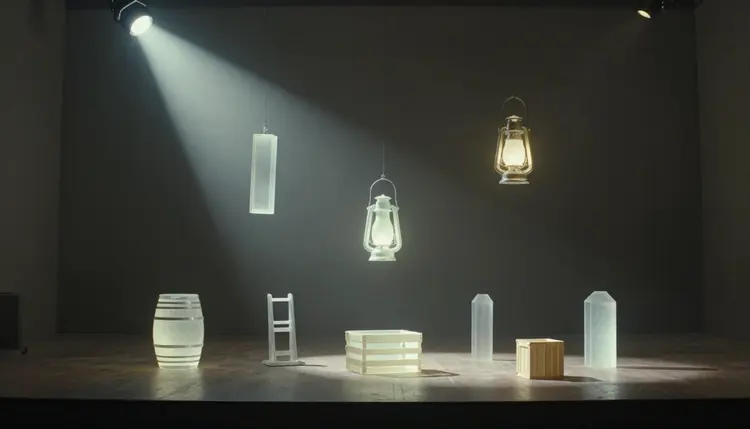
A single hero model can carry a render by itself, but a scene rarely holds together with just one object in it. Shelves need books, streets need crates, workshops need scattered tools, and modeling forty small props by hand eats a week you do not have. AI 3D generation turns a reference photo or a short description into a usable mesh in minutes, turning the background into a checklist instead of a bottleneck.
A hero asset gets examined. A background prop gets glanced at, walked past, or blurred by depth of field, and that difference changes how much cleanup time is worth spending on it. A crate stacked in the corner of a warehouse scene does not need the same topology or texture resolution as the weapon a player holds for twenty hours.
This is not an excuse to skip quality control, it is a budgeting decision. A prop sitting at the edge of frame can tolerate a slightly warped seam or a texture that repeats a little obviously, because nobody will stop to look closely. A prop centered in a hero shot, even briefly, needs the same scrutiny as a main asset. Sort your prop list into these two tiers before you generate anything, and you will spend your cleanup time where it actually shows.
The workflow on this page is aimed squarely at the first tier, the shelf of books, the pile of scrap metal, the row of potted plants along a balcony. If you need one specific object to survive a close-up, the image to 3D workflow covers that single-hero-asset case, including the extra reference angles a close-up model usually needs.
Pro tip: generate three or four variations of the same prop type, a few different crates, a few different books, rather than one prop repeated across the shelf. Fifteen copies of the same box reads as obviously generated; five distinct boxes reused in different combinations reads as a real, cluttered shelf.
Feed a 3D model a reference photo, or a written description of the object you want, and it returns a mesh with basic texturing applied. That is the honest scope of the output: a shape with color and material baked onto its surface, not a finished, game-ready asset. Treat the result as raw material for your software, not as something you drag straight into a shot.
In practice that means every generated prop needs a short pass in Blender, Maya, Unreal or whichever package you work in. You will check the pivot point, confirm the scale against your scene's units, and often clean up the topology before it is genuinely ready to place. None of that is unusual for any 3D asset, generated or hand modeled, but it is worth saying plainly so nobody expects a one-click final object.
Where generation actually saves time is the part that used to take longest: blocking out a rough, textured shape from nothing. A prop that would have taken forty minutes to box out, UV unwrap and hand paint now arrives in a couple of minutes as a starting mesh, leaving import and cleanup as the only manual steps left. On Picasso IA that generation step happens in the Toolkit, where you upload a reference image or type a description and pick a 3D generation model from the catalog.
A single prop rarely matters. What fills a scene convincingly is a small library of props that share a visual language, the same rough scale of detail, the same implied material palette and level of wear. Generate that library once, in a batch, and reuse it across every room, level or shot in the same project instead of generating one-off props each time you need clutter.
The trick to keeping a batch consistent is describing the shared traits explicitly, not just the individual objects. Instead of generating "a wooden crate" and separately "a metal toolbox" with no connecting thread, describe both against the same backdrop: weathered pine, rope binding, rust at the seams, the look of a dockside warehouse. Reuse that language across every prop in the set and the pieces read as belonging to the same place, even though each was generated independently.
Keep the library organized as you build it. A folder per scene or per project, with a naming convention that records the prop type and the pass it is on (crate_v1, crate_v2_cleanup), saves real time once a library grows past a dozen objects, and makes it obvious which props are approved for reuse. A product photographer building recurring set pieces gains the same benefit as a game developer dressing a level, a consistent prop library speeds up every shoot after the first one, the same way it does for product photography.
Not every object generates with the same reliability. Knowing which bucket a prop falls into saves a round trip.
| Prop type | Example | What to expect |
|---|
| Simple hard-surface | crate, bottle, book, brick | clean mesh, closest to ready, least cleanup |
| Organic or irregular | rock, coiled rope, houseplant | usable silhouette, surface often needs smoothing |
| Fine surface detail | woven basket, embossed label, engraved logo | detail tends to flatten, treat as a placeholder |
| Stack or cluster | pile of books, scattered tools, crate stack | generates as one fused mesh, hard to separate later |
Simple hard-surface objects are the reliable starting point, their flat faces give the model the least room to guess wrong. Organic shapes come out usable but softer than a hand-sculpted equivalent, fine for a background plant or rock but worth a second look up close. Fine detail is the category to plan around rather than fight, generate the base shape and add real logos as a texture pass afterward. Clusters save the most time but the least control, use them for one visual beat, not for pieces you will need to move independently later.
An honest tool page tells you where the shortcuts run out. Five limits show up consistently across prop generation, and knowing them up front changes how you plan a batch.
- Topology is rarely game-ready: meshes are built for visual accuracy, not a real-time budget, so a performance-sensitive engine usually needs retopology or decimation first.
- Fine text and logos rarely survive: engraved lettering, printed labels and small icons tend to blur or warp, so treat them as placeholders and replace with a real texture pass when it matters.
- Scale is never automatic: a generated prop arrives at an arbitrary size, and every import needs checking against your scene's real-world units.
- Materials describe, they do not simulate: the surface reads as wood or metal visually, but real roughness or subsurface scattering usually needs to be set up by hand afterward.
- It is not drag-and-drop: every prop still passes through your 3D software for import, pivot correction and often a cleanup pass before it belongs in a scene.
None of this makes the workflow less useful, it defines the job precisely: generation replaces the slow, blank-page part of modeling a prop from scratch, and your usual pipeline still finishes it. Beyond props, the model catalog covers upscaling and background removal for the textures and reference photos that feed this workflow.
The first batch takes longest because you are still deciding on a style. After that, adding ten more props to a library is a fast, repeatable pass. Credits are only spent on generation, and you can check what a run costs on the pricing page before committing to a large batch.
- Gather a reference per prop. A clear photo works best, or a short written description naming the material, scale and rough shape if no reference exists.
- Generate the 3D asset. Open the Toolkit, pick a 3D generation model, and feed it the reference or description one prop at a time.
- Import and check scale. Bring the mesh into your target software and compare it against a known object in the scene before you place it anywhere.
- Clean up topology if it matters. For a real-time engine or another performance-sensitive use case, retopologize or decimate before the prop goes into the level.
- Texture and place the finished prop. Apply or refine the material, set the pivot, and drop it into the scene alongside the rest of the library.
Can AI actually generate a usable 3D prop from just a photo?
Yes, for the kind of background object this page covers. A clear reference photo gives the model enough information to produce a mesh with basic texturing that matches the object's rough shape and material. It will not capture every seam or scratch, and it still needs an import and cleanup pass, but for a prop nobody will examine closely, one good photo is usually enough.
What is the difference between this and a hero 3D asset?
Scrutiny. A hero asset gets picked up and looked at closely, so it needs careful topology, multiple reference angles and a real cleanup pass. A background prop gets glanced at from a distance, so a rougher mesh is genuinely fine. This page is about generating many of the second kind quickly; the image to 3D workflow is where to go when a single object needs to hold up to inspection.
Do generated props come out game-ready?
Not automatically. What comes out is a mesh with basic texturing, and topology is optimized for visual accuracy rather than a real-time polygon budget. If the target is a game engine, plan on a retopology or decimation pass before the prop ships, the same step you would take with any high-detail source asset brought into a real-time pipeline.
Can I generate several props in a consistent style?
Yes, and it is the difference between a convincing scene and a pile of unrelated objects. Describe the shared material language and wear level explicitly in every prompt, not just the individual object, and reuse that description across the whole batch. Props generated with the same shared vocabulary read as belonging to the same place even when each is generated separately.
Will text or logos on a prop come out readable?
Rarely, and it is worth planning for rather than fighting. Engraved lettering, printed labels and small icons tend to blur or distort during generation. The reliable approach is to generate the base shape without expecting the text to resolve, then apply a real label or logo as a texture afterward if it needs to be legible.
How do I get the scale right when I import a prop?
Check it against something in the scene you already trust. Generated meshes arrive at an arbitrary size with no real-world unit attached, so place the imported prop next to a reference object, a doorway, a character rig, a known measurement, and scale it to match before doing anything else. Skipping this step is the single most common reason a generated prop looks wrong once it is in a scene.
Can I generate a whole cluster of small items at once, like a pile of tools?
Yes, and it fills a corner of a scene fast, but the cluster generates as a single fused mesh. That is fine for a background pile you will never touch individually, but the wrong choice if you need to move or duplicate pieces separately later. For anything you expect to rearrange, generate the individual objects instead and place them by hand.
How many props should I generate before I start dressing a scene?
More than you think you need, since not every result survives your quality bar. A reasonable starting batch is three to five variations per prop type, book, crate, plant, so you can pick the cleanest and discard the rest. Building the library slightly oversized costs a little more generation time up front and saves you from running back mid-scene for one more variant.
Does this work for product photography set dressing, not just games?
Yes, the same generate-and-import pattern applies. A product photographer building a recurring backdrop, crates, packaging, props around a hero item, can generate that supporting set once and reuse it across every future shoot instead of sourcing physical props each time. The product photography workflow covers the hero object side of the same shoot.
Is Picasso IA free to try for generating a few props?
New accounts receive free credits, enough to generate several props and judge whether the mesh quality and workflow fit your pipeline. After that, generation costs credits, and plans are listed on the pricing page. There is no separate tier for 3D generation, the same credits work across image, video, audio and 3D models.
Your first prop can be on your screen in the time it takes to describe it. Open the Toolkit and generate the crate, the plant or the pile of books your scene has been missing.