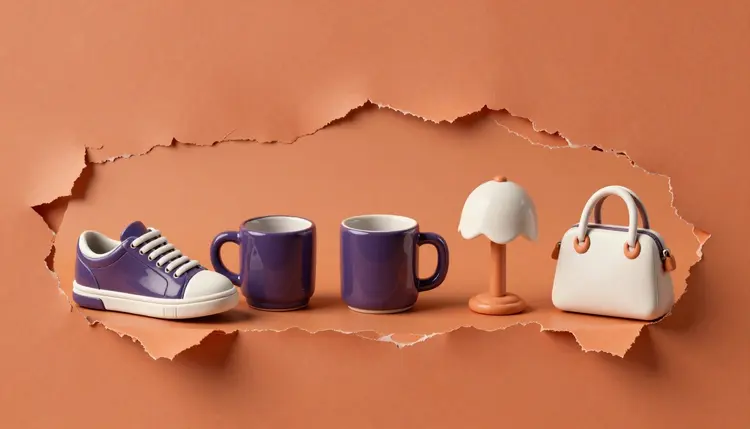
A catalog full of product photos shot on tables, floors and kitchen counters is not a design problem. It is a repetition problem, and repetition is exactly what code is for. The Picasso IA developer API is built around that idea: you create a key in your account, send one request per image that names a background removal model, and get the cutout back as a file you can download. This page covers how that works, which models fit, and where it stops.
Removing one background by hand is a two-minute job. Removing the background from every photo in a shop is a different job entirely, because the work is not hard, it is endless. New products arrive, old ones get reshot, and a marketplace asks for a different background than your own storefront does.
An API turns the task into a loop. Your script reads a folder or a product feed, sends each photo to a background removal model, and saves what comes back next to the original. The rule you chose once, soft edges or hard edges, white background or transparent, is applied the same way to the five hundredth photo as to the first. That consistency is the real gain, more than the saved minutes: a catalog where every product is cut the same way looks like one shop instead of a pile of uploads.
The API uses the same models and the same credit system as the toolkit. Picasso IA runs 502 models in total, and background removal is a small, focused corner of that catalog, with one dedicated category plus a few cutout models filed elsewhere. Access works with a key you create in your account, and you should treat that key like a password: keep it out of shared code, out of screenshots and out of anything you commit to a public repository.
Three models cover most catalog work. They are not interchangeable, and picking the right one for each kind of photo saves you re-runs. The toolkit lets you try each of them on a real photo today, and the model pages list the current input limits, which are worth reading before you plan a large run.
| Job | Model | What you get back | Worth knowing |
|---|
| Everyday product and portrait cutouts | bria/remove-background | A transparent PNG | Keeps soft edges like hair and fabric, or can force hard clean edges for packshots |
| Large or detailed stills | recraft-ai/recraft-remove-background | A transparent PNG | Takes high-resolution inputs, so it suits big catalog originals |
| AI-generated product art | recraft-ai/recraft-remove-background | A transparent PNG | Handles intricate generated textures where simpler tools clip the edge |
| Short product or talking-head clips | bria/video-remove-background | A video with a transparent or solid-color background | Keeps the original audio unless you turn that off |
| Hard-edged packshots | bria/remove-background | A cutout with fully opaque edges | Best when the product has a crisp outline and no fine fuzz |
Start with bria/remove-background for the bulk of a catalog: it is the one model in the dedicated remove-backgrounds category, and it gives you the clearest control over edge behavior. Keep recraft-ai/recraft-remove-background for the originals that are large or visually busy. The full catalog lists everything else if a photo type does not fit any of these.
These steps describe the journey in plain words.
- Test three photos in the toolkit. Open the toolkit, pick a background removal model and run a plain product shot, a shiny one and a messy one. Whatever fails here will fail at scale, so find out now.
- Create a key in your account. The key identifies you and spends your credits, so store it somewhere private and never paste it into a shared document.
- Send one request per photo. Your script names the model, attaches one image and asks for the cutout. One request makes one generation, and each one costs credits that depend on the model and the settings.
- Download the file that comes back. The result is a file, a transparent PNG for the image models, which your script saves next to the original under a predictable name.
- Review a sample before you publish. Open a slice of the results at full size, check the edges, and re-run the few that failed with a different model or setting.
Because every generation takes time, a long loop is a job you start and come back to, not something to watch. Pace it, log which files finished, and make the script skip anything already saved, so an interrupted run resumes instead of paying twice for the same photo.
The cutout is only half of what makes a catalog look professional. The other half is that every product sits the same way, at the same scale, on the same ground. The model handles the outline. Your photography and your layout rules handle the rest.
Settle three decisions before the first request: transparent or solid background, soft or hard edges, and which model handles which kind of photo. Changing any of them halfway through a catalog means redoing every image you already finished.
Photograph against a plain surface whenever you can. Cutout models cope with clutter, but they are most reliable when the product and the backdrop differ clearly in color and brightness, and a white mug on a white tablecloth is a hard case for any model. Keep the whole product in frame, because a model cannot invent the corner you cropped out, and leave a little space around the edges so the outline does not touch the border of the image.
Run the same model with the same settings for the same product family. Mixing two models inside one set of shoes can give subtly different edge softness from one angle to the next, and shoppers notice that without knowing why. If you need both a transparent file and a white-background file, save the transparent cutout as your master and build the other versions from it, not from a fresh run.
A transparent PNG is a starting point. Most catalogs use it in three ways. First, a flat white or neutral background for marketplace listings, which usually ask for a clean backdrop. Second, a branded color or gradient for your own storefront, so the shop looks designed instead of assembled. Third, a placement on a lifestyle scene, where the product sits in a generated room or on a generated surface.
Each of these has a matching page here. The remove image background page covers the one-photo workflow in detail, the transparent PNG maker page covers the file format questions, and Amazon listing photos covers what a marketplace image needs. Each platform publishes its own image requirements and updates them, so check the current requirements of the marketplace you sell on instead of relying on a number remembered from somewhere else.
Selling carries one rule that matters more than any setting: the picture must stay truthful about the item. A cutout removes the background, not the flaws, and the edges should never be cleaned so aggressively that the shape of the product changes. If the model clips a strap, a handle or a transparent part of the object, fix it or reshoot it. If you want a cutout product placed on a generated scene, the AI product photography page walks through it, and the same truthfulness rule applies there.
An honest page says where the tool stops. For background removal at catalog scale there are five places.
- Generation takes time and costs credits: every request is one generation, so a big catalog is a budget and a waiting period, not a single instant action, and the cost depends on the model and the settings you pick.
- Models differ on hard subjects: glass, thin chains, mesh, fur against similar-colored backdrops and transparent bottles are hard for any model, and one may handle a photo that another clips.
- Outputs need review: a model returns a confident-looking cutout even when an edge is wrong, so someone has to look at the results, at least as a sample.
- The photo sets the ceiling: a blurry, dark or cropped original gives a poor cutout, and the model cannot recover the sharp edge that the camera never captured.
- It is not a retouching tool: the model removes a background, it does not fix color, wrinkles, dust or reflections, so those still belong to your photography or an editor.
None of this is a reason to skip the API. It is the reason the sample review in step five exists.
Can I really remove backgrounds from code?
That is what the Picasso IA developer API is for: you create a key in your account, send a request that names a background removal model and attaches an image, and the cutout comes back as a file you download. The models are the same ones the toolkit runs, so you can test a photo there today and see the quality before you decide how large a run to make.
Which model should I use for product photos?
For most product photos, start with bria/remove-background, since it is the model in the dedicated remove-backgrounds category and lets you choose between soft natural edges and hard clean ones. Use recraft-ai/recraft-remove-background for large originals or generated art with intricate detail. Run both on a few of your own photos in the toolkit and keep whichever clips the fewest edges.
Does it work on video too?
There is a separate model for video, bria/video-remove-background, which removes the background from a clip and can leave it transparent or fill it with a solid color, keeping the original audio by default. It is a different step from the image models and it takes longer, so treat clips as their own batch and test one before you queue several.
What do I get back for each request?
One request makes one generation, and the result comes back as a file you can download. For the image models that is a transparent PNG, which your script can save next to the original. Anything beyond that, such as converting to a white background or resizing for a marketplace, is a second step you build in your own code or in an editor.
What does it cost to run a whole catalog?
Each generation costs credits, and the amount depends on the model and the settings, so there is no single number to quote. Because a catalog is many generations, test a small sample first and watch what it spends before you scale up. New accounts get free credits, and the pricing page is the place to see how the plans work.
How do I keep my key safe?
Treat it like a password. Keep it in an environment variable or a secrets store, never in the code you share or commit, and never in a screenshot or a support message. Anyone who has the key can spend your credits, so if you think it leaked, create a new one in your account and stop using the old one.
What if a cutout comes out wrong?
Re-run that photo with the other model, or change the edge setting on the first one, and compare. If a strap or an edge is still clipped, the photo itself is usually the problem: low contrast with the backdrop, motion blur or a cropped corner. Reshoot it against a plainer surface, or fix the single file by hand, rather than accepting a shape that misrepresents the product.
Can I use cutouts on Amazon, Etsy or my own store?
A transparent PNG is a fine starting point for any of them, but each marketplace sets its own image rules and changes them over time. Check the current requirements of the platform you sell on, then build the white or colored background from your cutout to match. For your own store you set the rules, so pick one background style and keep it consistent.
Can I cut out people, or only products?
The models handle people as well as objects, including hair, which is a common use for headshots and profile images. Use photos of yourself, people who have agreed to it, or fictional characters. Do not cut out and reuse a real identifiable person's image without their permission, and remember that a cutout does not change who owns the original photo.
Do I need the API to try this?
No. The toolkit runs the same catalog in the browser: pick a background removal model, attach a photo and generate. That is the quickest way to judge quality and to find the settings you want before you automate anything. The API is for the point where you have hundreds of photos and a script is simply less work than a click each time.
Test a handful of your own product photos in the toolkit first, and if anything about the process is unclear, support will answer it.